Blog
Change is a natural part of the process, whether we talk about the physical or the virtual realm. We can talk about change that comes in two forms — one which seeks improvement, and the other which comes at the cost of change for the sake of change. Today we want to share with you the story of one of the most recent changes we’ve made here at Presslabs, in our seek for continuous improvement.
At the end of 2017, we made a facelift to our beloved site. Although it may not come as a tremendous event to many people, it was a big deal for us, as we’ve learned quite a few things in the process of making. Therefore, we want to share with you how we refined it, from design to development and content creation. Our project team, made of Mihai, Mile, Anna, and Anca, has worked tirelessly to bring the new version to light.
Competing in a lively Managed WordPress Hosting services market, we wanted our site to genuinely reflect the way we do things. Besides the release of a new version of our dashboard last year, which got a complete makeover, we felt that the site didn’t represent us in a rightful manner. So we took action.
Considering the fact that we had numerous open-source projects, we created a dedicated site to showcase them, namely presslabs.org. We made this separation with the aim of encouraging developers in the open-source community to offer feedback, spread the word and, hopefully, contribute with services and plugins. Another reason for this change was the ease of maintaining two different WordPress themes at a time when the main site underwent numerous changes.
In our experience, the process of changing a WordPress theme is sometimes ubiquitous. We’ve summarized the process in two key steps on how to improve a WordPress theme, using our examples.
First and foremost, the graphic design should display the personality of the brand. Consistent look & feel, the ability to visually describe the way the product works, and a certain ease in interaction and a friendly end-to-end journey on a website can make a huge difference to potential customers.
In our case, the previous version felt short of outlining the changes that have risen at launching the newest version of our dashboard, which introduced the WordPress Intelligence feature pack and an overall sleek design.
Midway through last year, we launched the 5.0 version of the site, which was developed in a haste, in order to come as a companion to the release of the Presslabs dashboard. Although it lacked certain elements, we later introduced them in the 5.1 version at the beginning of this year.
The new version came with an improved version of the information structure, tailoring it according to the needs of our target audiences. These changes reflected also in the design process; we’ve integrated a brighter color palette to accommodate and welcome the Enterprise, agencies and publisher landing pages, and we’ve modernized our typography, incorporating Nunito Sans.
As for what the future holds, the aspect of our dashboard will further undergo some changes as we’ll constantly work on developing and optimizing it, as well as introducing new features.

The next step concerns the actual development of the WordPress theme. Probably the most important aspect here is to work with up-to-date technologies in order to tweak key metrics like as average page load time.
Having accommodated ourselves with technologies such as ReactJS while working on our dashboard, we thought it would be a suitable choice for the development of the WordPress theme, too. Additionally, we reoriented to webpack bundling instead of gulp, ReactJS instead of JQuery, and the good old Sass with improvements like autoprefixer and automatic conversion from pixels to rem (webpack-px-to-rem). For the layout, we used CSS Grid and Flexbox instead jeet.gs, our previous alternative.
In terms of HTML, we used static WordPress, with templates for every page, and partials for files like footer.php and header.php.
At the moment, there is a big debate on whether CSS Grid or Flexbox is better. We used both in developing our theme, and they worked perfectly together.
Using them alongside helped us tackle all sorts of issues, as Flexbox is content-based, and CSS Grid is layout-based.
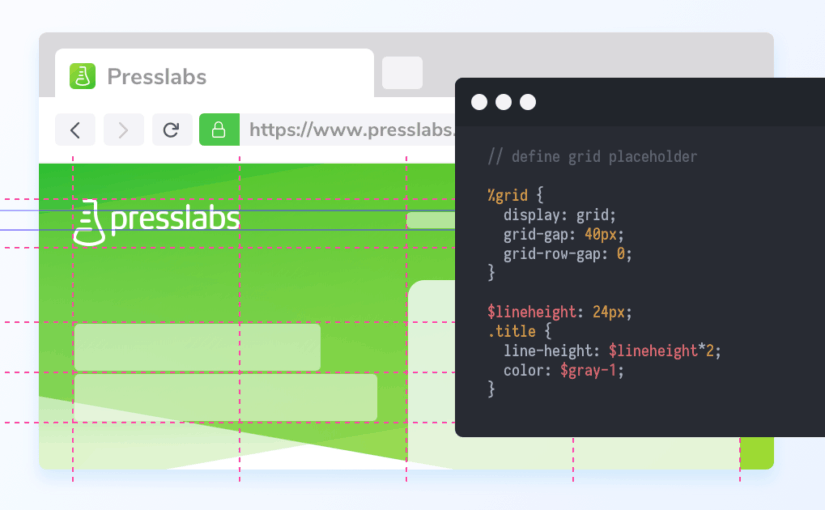
CSS Grid grants a simplified workflow and handles well responsiveness with the help of CSS Grid Templates, which provides source ordering, without requiring HTML code modifications.
In the snippet below you can see how easily you can define a layout that changes with a medium breakpoint. This would have been harder to do with the rudimentary CSS.
.page-wrapper {
  @extend %grid-1;
  grid-template-areas: "content"
  "description";
  @include breakpoint($medium) {
    @include grid(2);
    grid-template-areas: "content screenshot"
    "description screenshot";
  }
}You’ve probably heard about React, but using it on WordPress might seem a little bit daunting. We’ve had our fair share of nasty experiences with it, and we’re here to give you some bit of advice on how to use it on WordPress.
Using React has numerous advantages like a cleaner, easier to read code, and because it’s structured on components, it’s easier to scale, too. On the other hand, there are some drawbacks as it’s a little bit complicated to use React on non-SPA (non-Single Page Application), where you have to bind React to an existing DOM. We resolved this issue by using a Slider example.
In the HTML file, we passed data attributes to the root file, as in the snippet below.
<div id="screens" data-screens='[{
"image": "<?php echo get_template_directory_uri() ?>/images/screenshots/comp-01.png"
}, {
"image": "<?php echo get_template_directory_uri() ?>/images/screenshots/comp-02.png"
}, {
"image": "<?php echo get_template_directory_uri() ?>/images/screenshots/comp-03.png"
}]'></div>
Next, the root is defined in the index.js file, and the data is parsed and passed as props.
./index.js:
import React from 'react'
import { render } from 'react-dom'
import Screens from './components/screens'
const root = document.getElementById('screens')
if (root) {
  const screens = JSON.parse(root.dataset.screens)
  render(<Screens { ...{ screens } } />, root)
}
Finally, the Screens Component takes the data as an image array.
./components/screens.js
import React from 'react'
import ReactDOM, { render } from 'react-dom'
import classNames from 'classnames'
import { map } from 'lodash'

import Slider from './slider'

class Screens extends React.Component {
  render() {
    const { screens } = this.props
    return (
    <div className="screens-slider">
    <Slider>
    { map(screens, (screen, index) => (
      <div key={ index }>
        <img src={ screen.image } ref={ `image-${index}` } alt="Presslabs Screenshot" />
      </div>
    )) }
    </Slider>
    </div>
  )
 }
}

export default ScreensWorking with WordPress requires an initial set up of your own development environment in order to write and test your code easily. We made use of our platform’s development sites for staging, through which we also got our git support.
Using git, we have the following process:
Seeing how changes in the code affect your site is an important element in the process of developing the WordPress theme. We had a webpack watcher that we started with the command: yarn dev, which had a proxy to a virtual machine which ran WordPress. This was made in order to reap the benefits of webpack HMR. We made use of Virtualbox/ Docker to run WordPress and the theme locally.
One month after the final touches to the overall look and feel of the theme, we’ve gathered the data to see if we improved the stats. We saw a decrease in average page load time from 4.91s to 2.83s, and another one in our average server response time, from 0.10s to 0.07s. All in all, we’ve received positive feedback, just in time to welcome new visitors after making it in the top tier in the 2018 Enterprise Wordpress Hosting review.
In case you have any questions related to this topic, or if you wish to find out more about our managed WordPress hosting platform, please drop us a line at ping@presslabs.com.