Install and configure Toplytics
Check out how to install and configure the Presslabs Toplytics plugin to your Google Analytics account with step-by-step detailed explanations and screenshots.
Overview
You can simply search it in the WordPress plugins, install and activate it, or download it and upload it in wp-content/plugins and again activate it from WordPress.
NOTE
This documentation is for our new Toplytics version 4.0 which is still in beta, for the current Toplytics version 3.2 please see the documentation on wordpress.org .
As mentioned before, Toplytics displays the most visited posts as a widget using data extracted from Google Analytics, so it needs to be connected to Google Analytics. You need to have Google Analytics active on your site if you want to use this plugin.
This means you need to set up your site in Google Analytics . To set up your site in Google Analytics you need to create an account and to add your site as a property . Then you need to set up Analytics tracking on your site . You will have a tracking code you need to copy and paste as the first item into the HEAD of every webpage you want to track or you can use the Google Tag Manager to help you help you add tags to your site.
Don’t panic if this seems complicated, there are a lot of WordPress plugins which come to the rescue and we have written all you need to know about Analytics tracking in this article about Google Analytics in WordPress .
There are also a lot of WordPress plugins to help you insert the tracking code, check this article about
![]()
We offer two possibilities to use Toplytics: through Public Authorization or the Private Authorization.
Public Authorization
This method is using the Presslabs public API key to authenticate you to the Google Analytics API, and you don’t have to set up your own API keys.
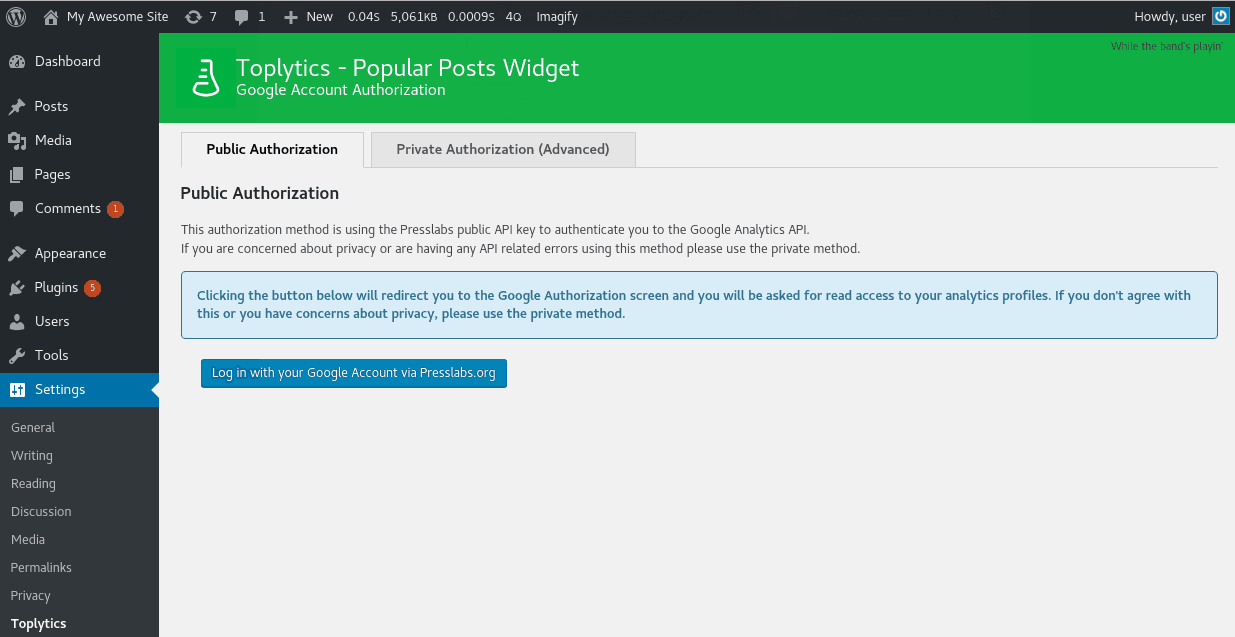
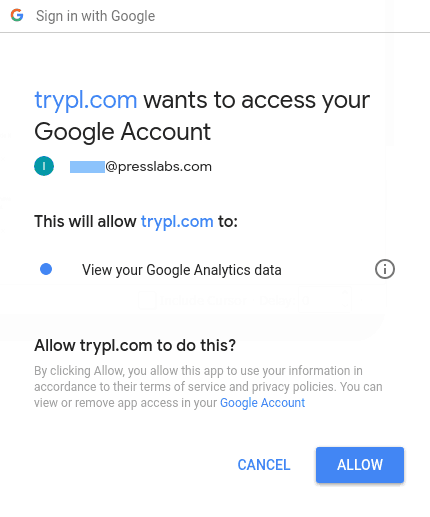
To use the Public Authorization simply press the Log in with your Google Account via Presslabs.org button and you will be redirected to the Google Authorization screen where you will be asked for read access to your Analytics profiles.
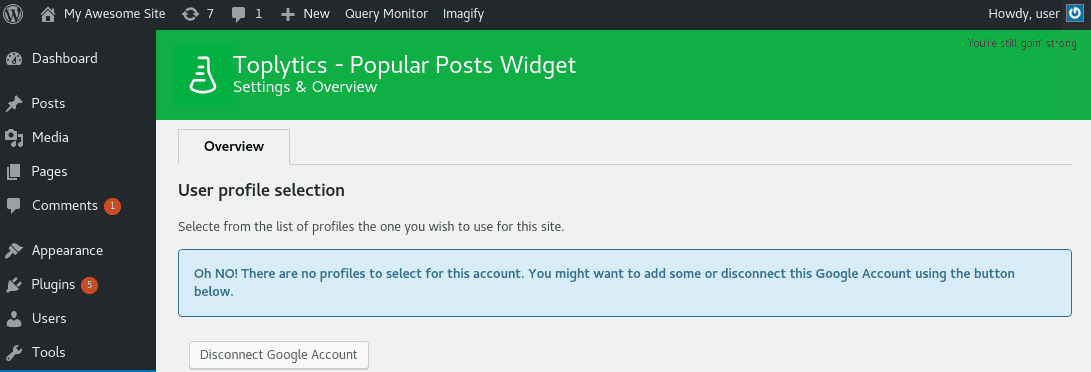
Then you need to select your profile.
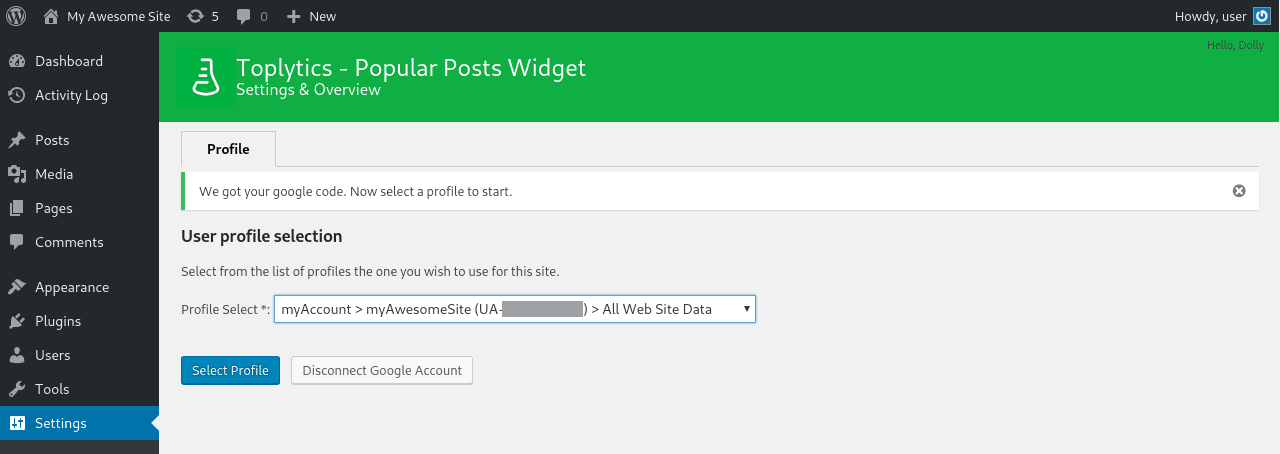
In case you have no user profile set up in your Analytics account, a warning message will appear:
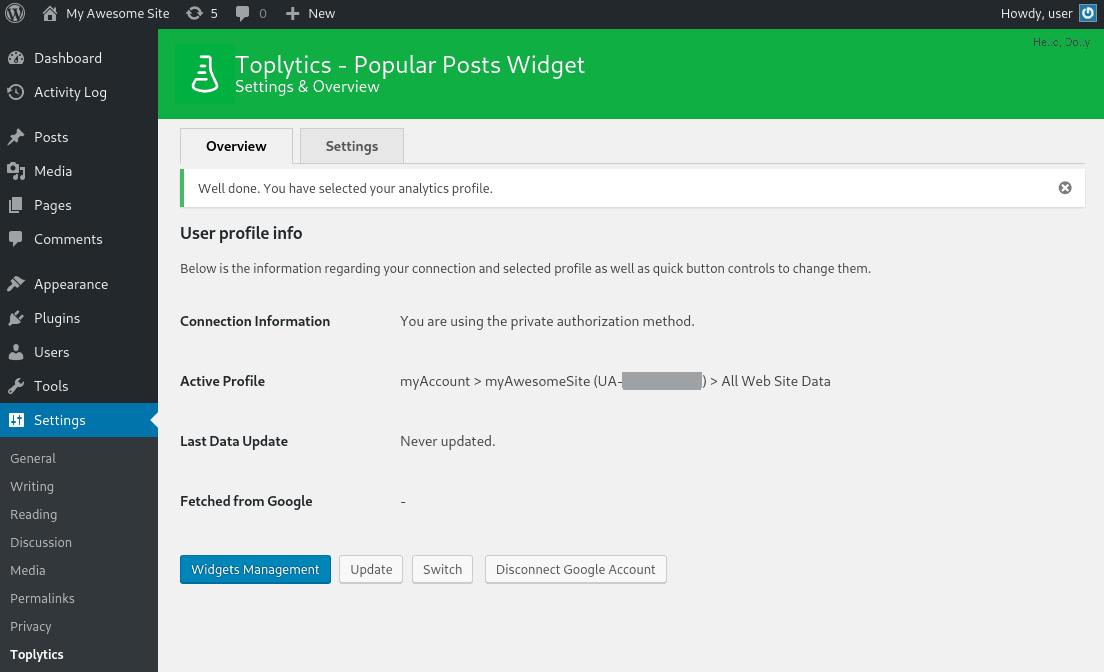
Now you are all set to use Toplytics to display your most visited posts.

Private Authorization
The private authorization is the recommended way in using Toplytics, as it offers you complete control over the connection by using your very own API keys and application for granting access.
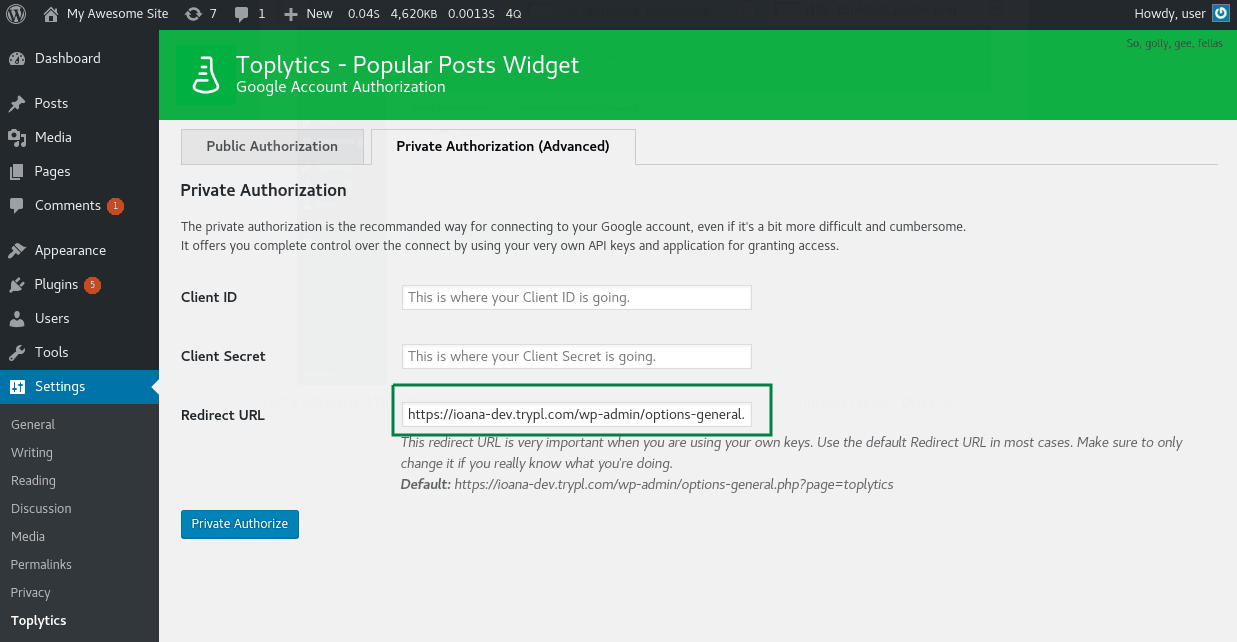
You need to enter your Client ID and Client Secret from your Google Analytics account. The next steps will guide you in configuring your Google Analytics account to Toplytics. Keep in mind that you will need the Redirect URL mentioned in this page further in configuring Toplytics.
Step 1: Register client application with Google
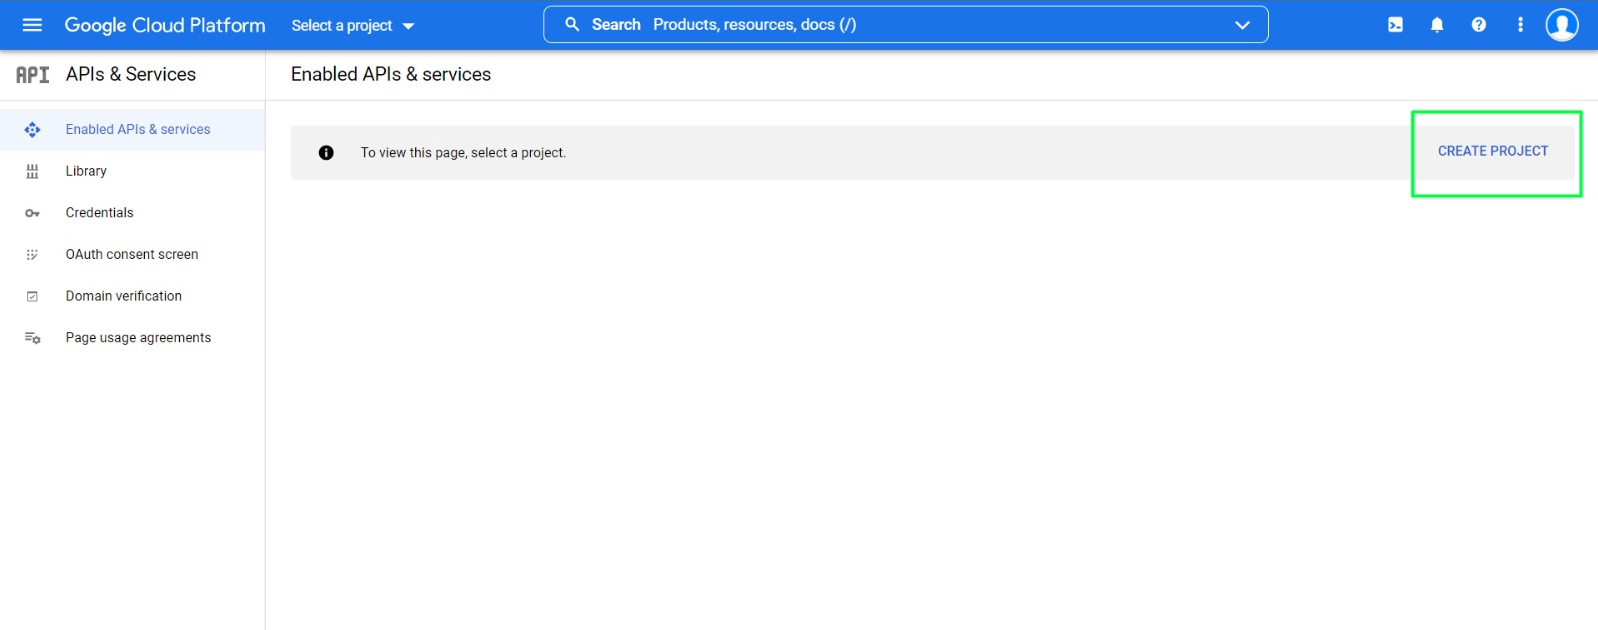
Every application has to be registered with the Google API so that we can use the OAuth 2.0 token during the authentication and authorization process. To register an application the user has to login to the Google account and go to
Google API Dashboard
.
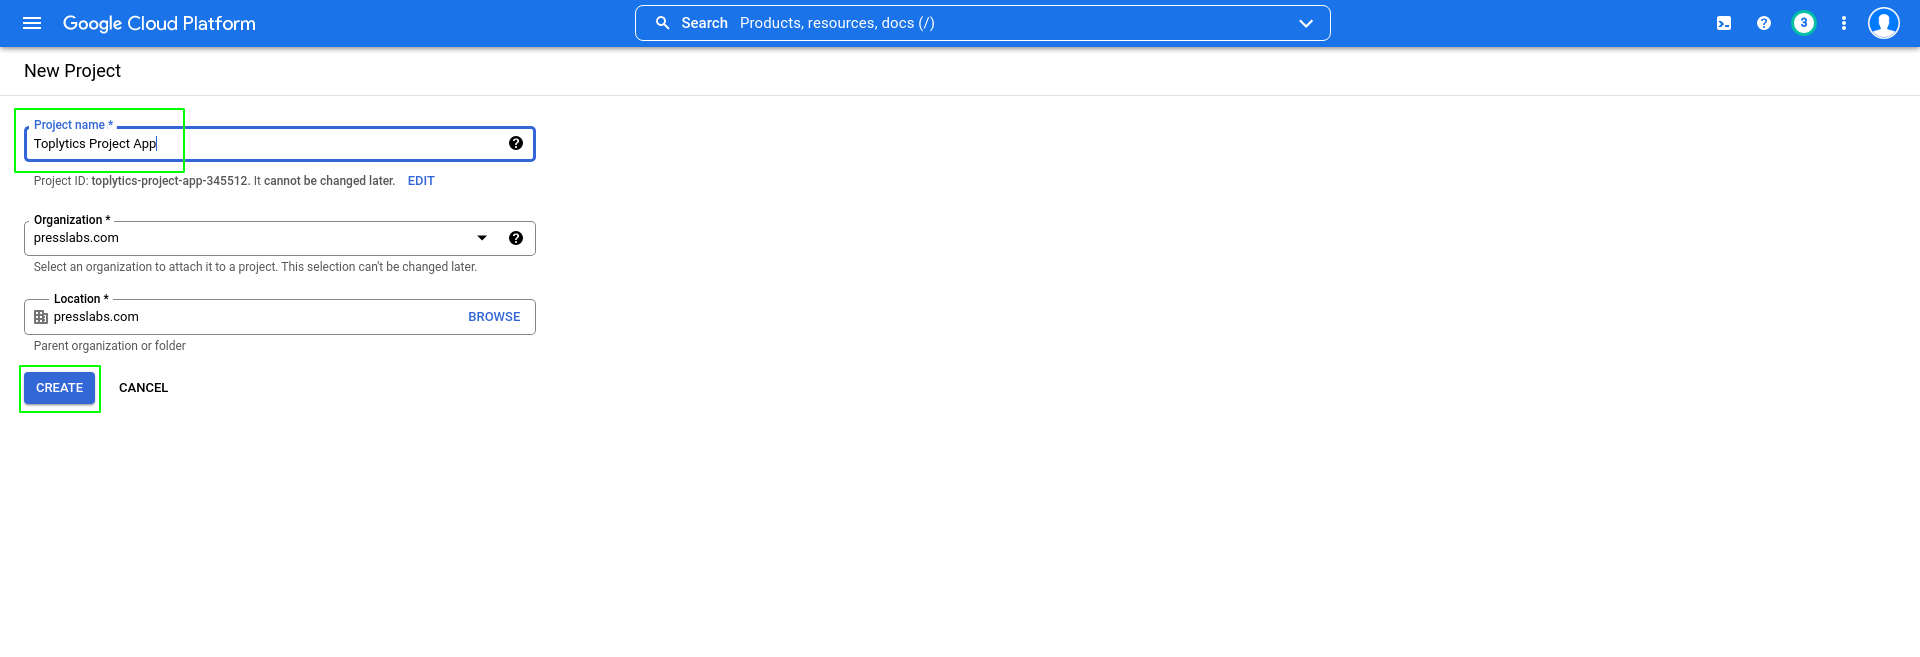
1.1. Create new project
From Google API console create a new project using the Create button. To set up properly the client application, select a unique “project name”.
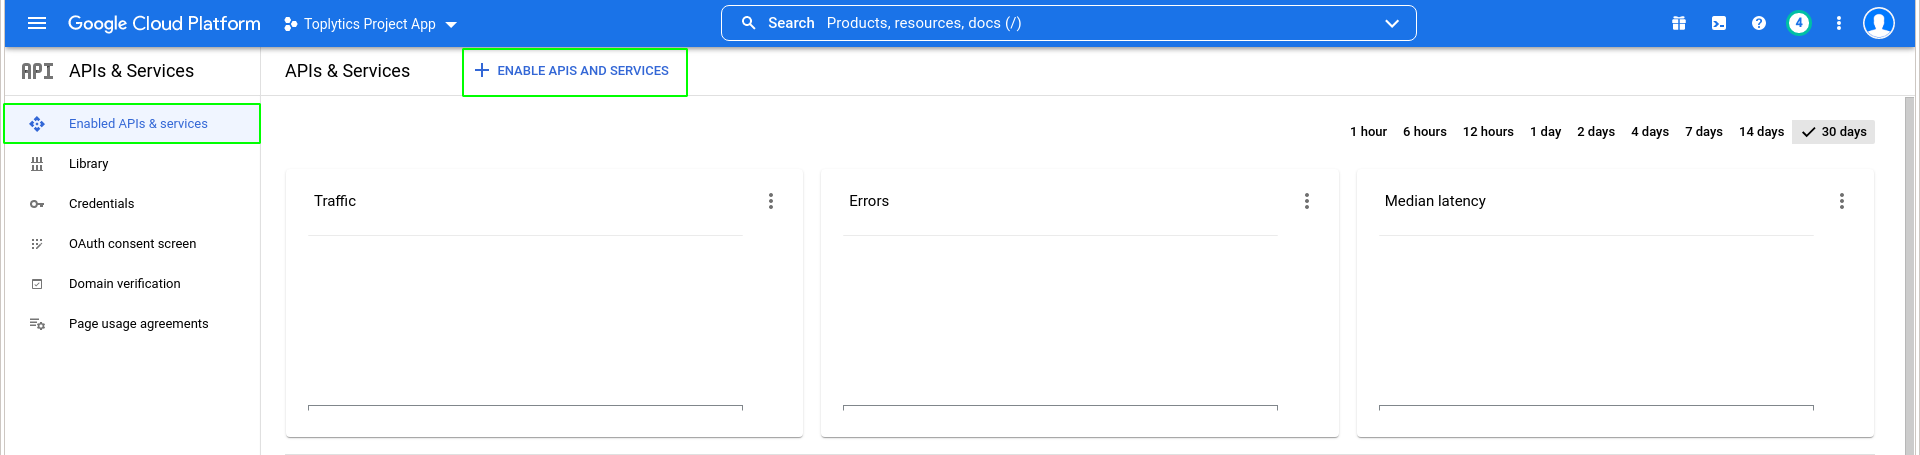
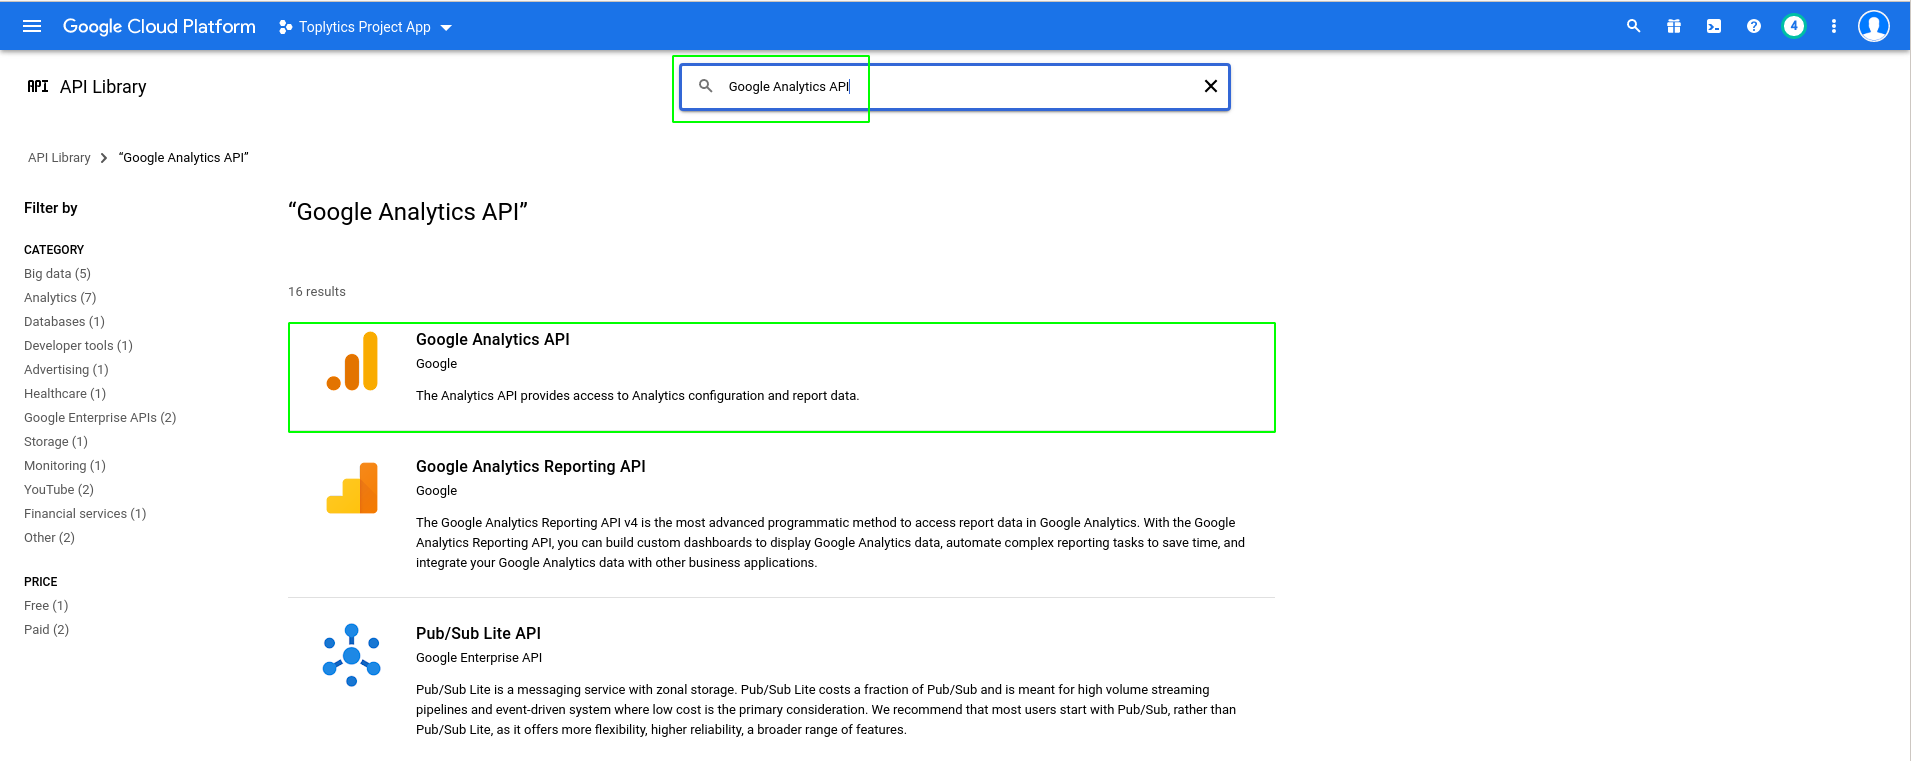
1.2. Enable the Analytics API
From the Google API Dashboard go to Enable APIs and Services and browse the library to find the Google Analytics API then click it and enable it.

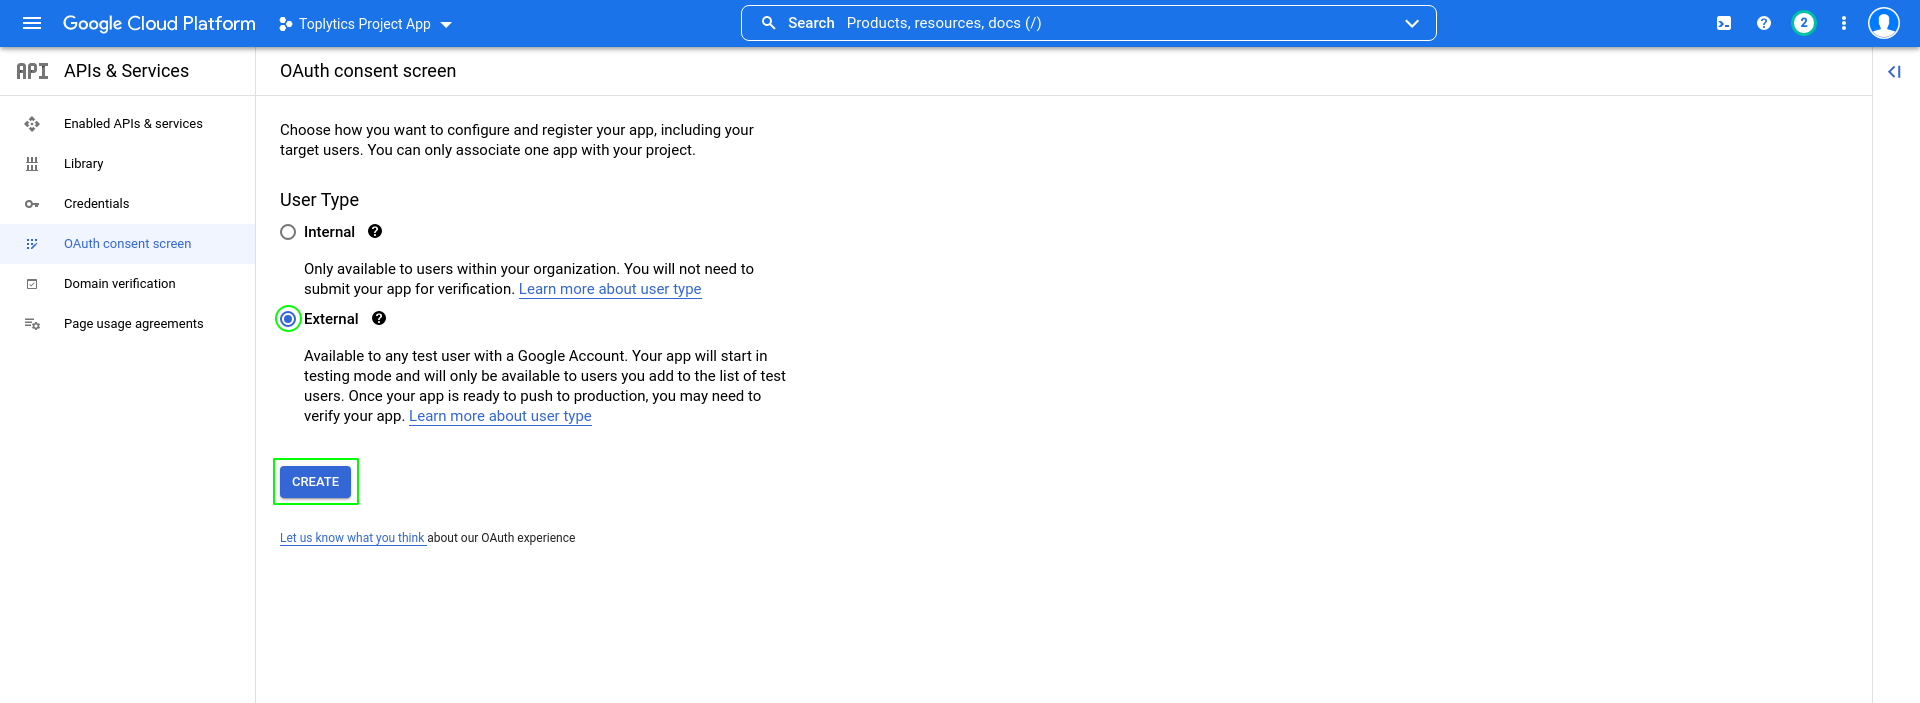
1.3. Create new Client ID
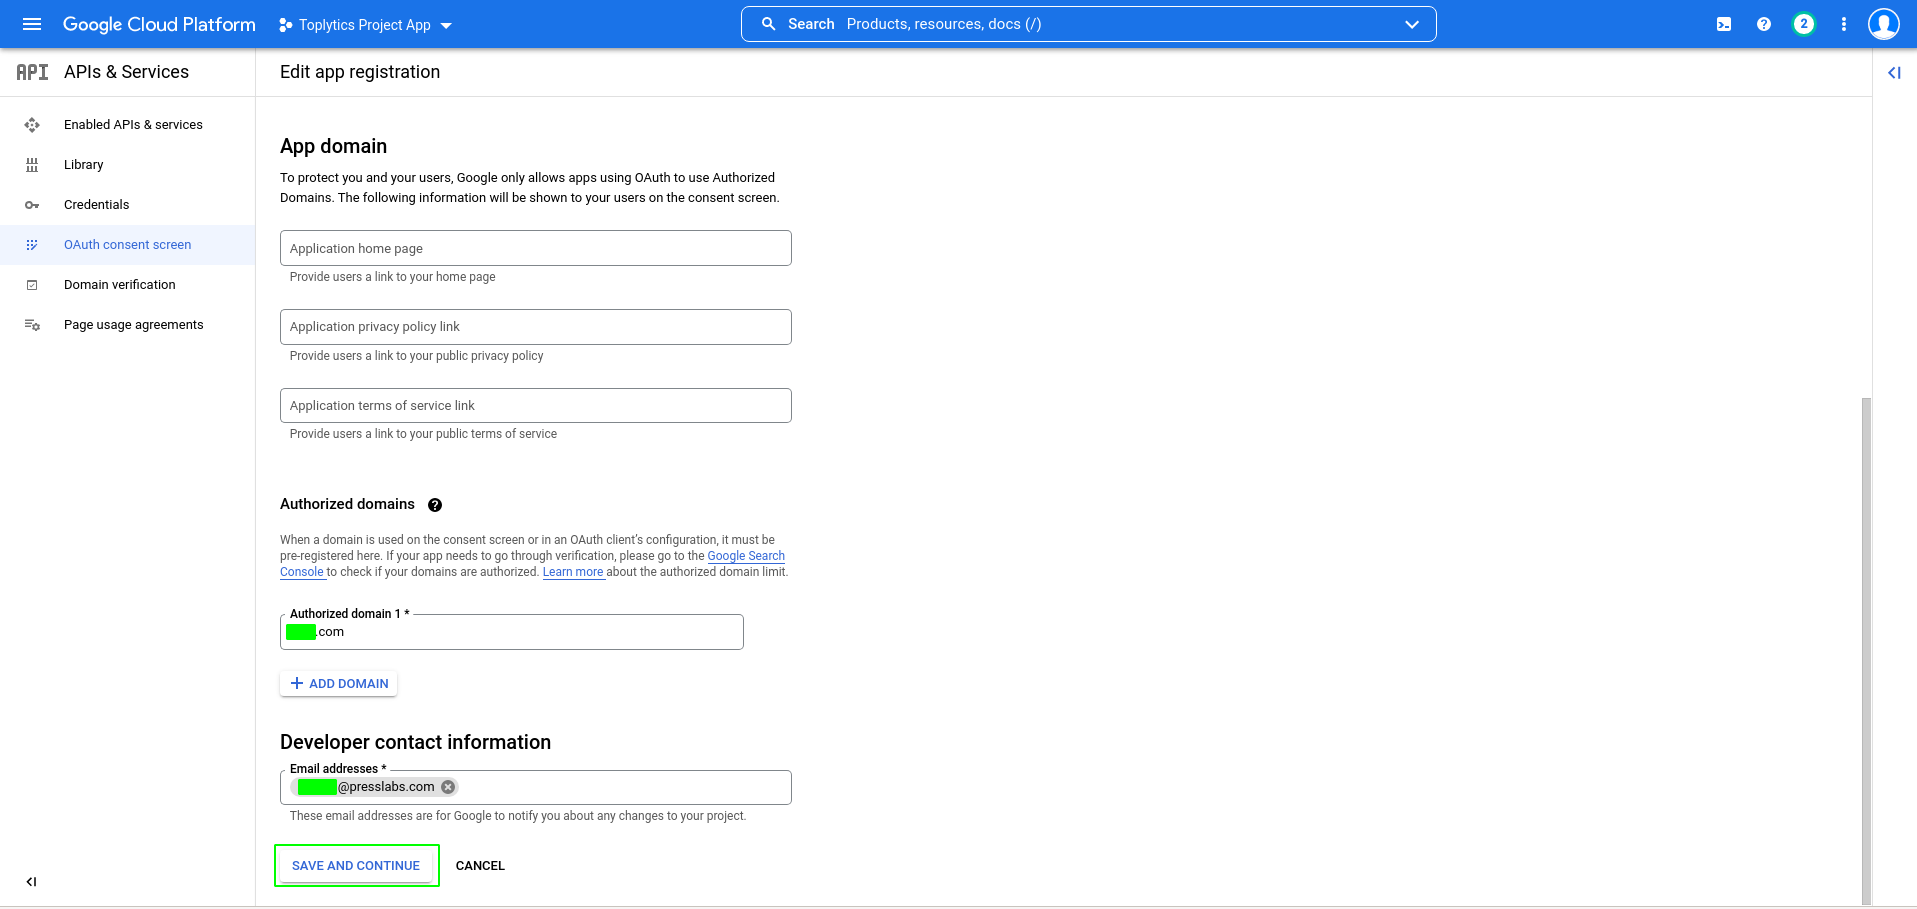
Go to the OAuth consent screen tab and choose the External user type if you don’t have a business Google account and click on the Create button.
Complete your app information.
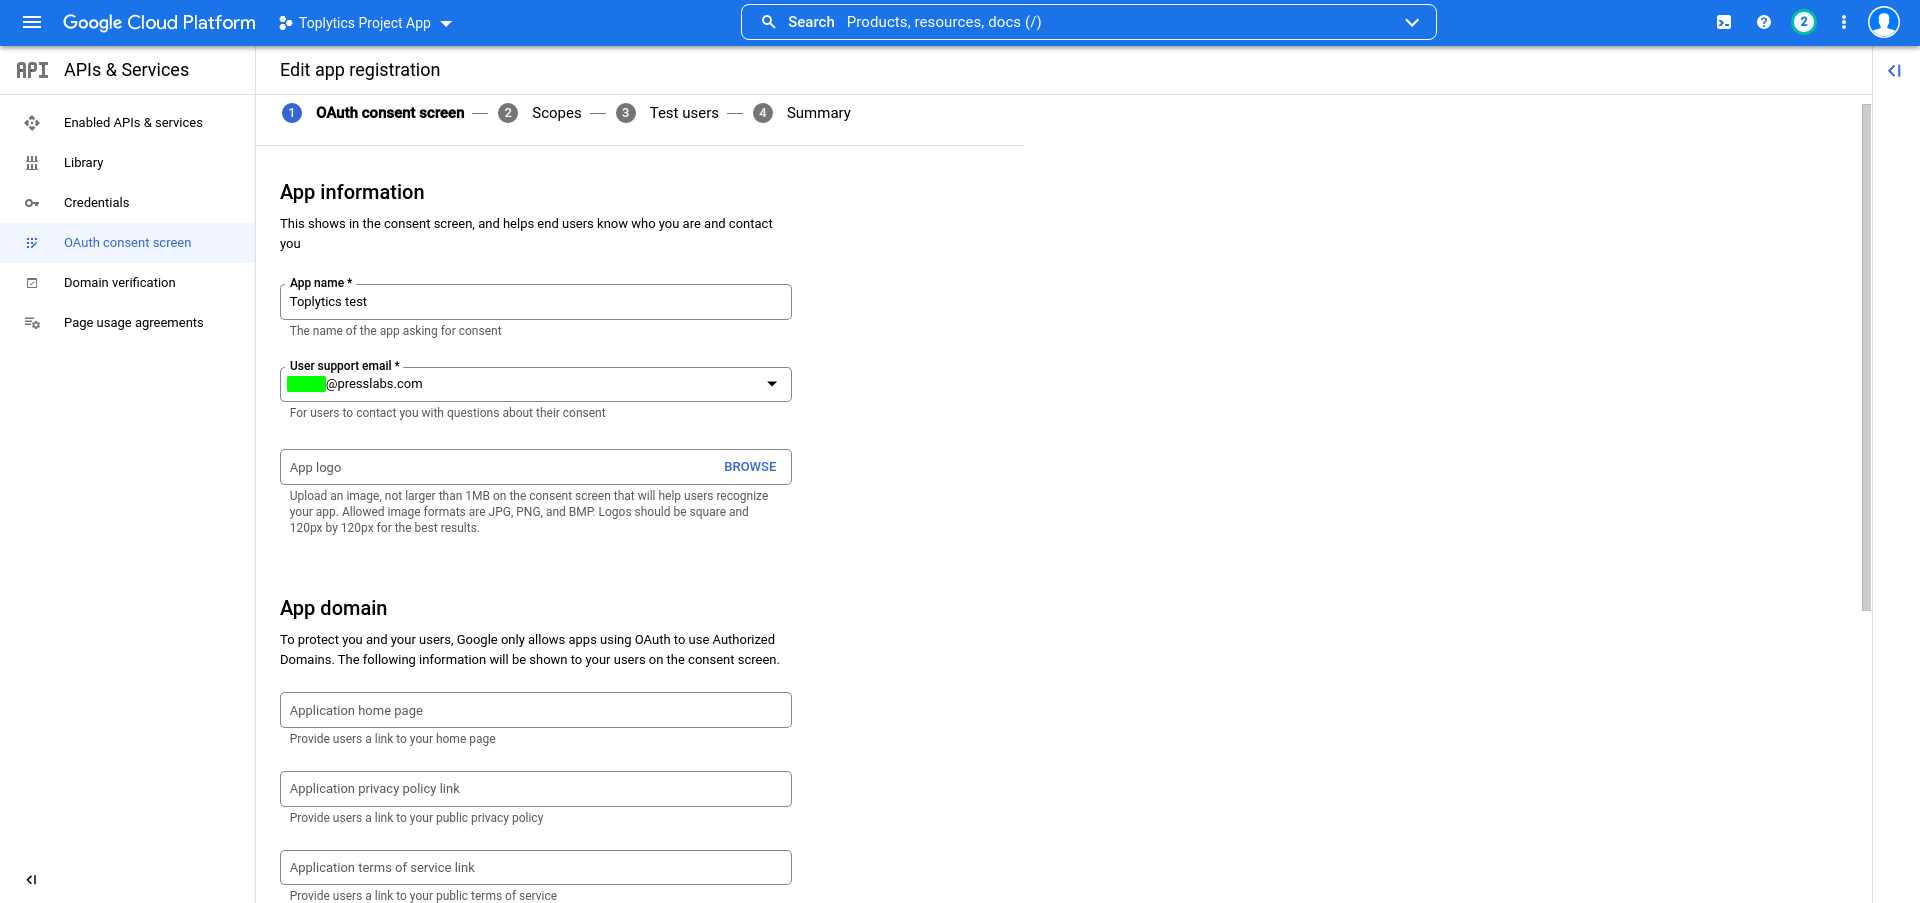
Complete your authorized domain name (top level domain) and click on the Save and continue button.
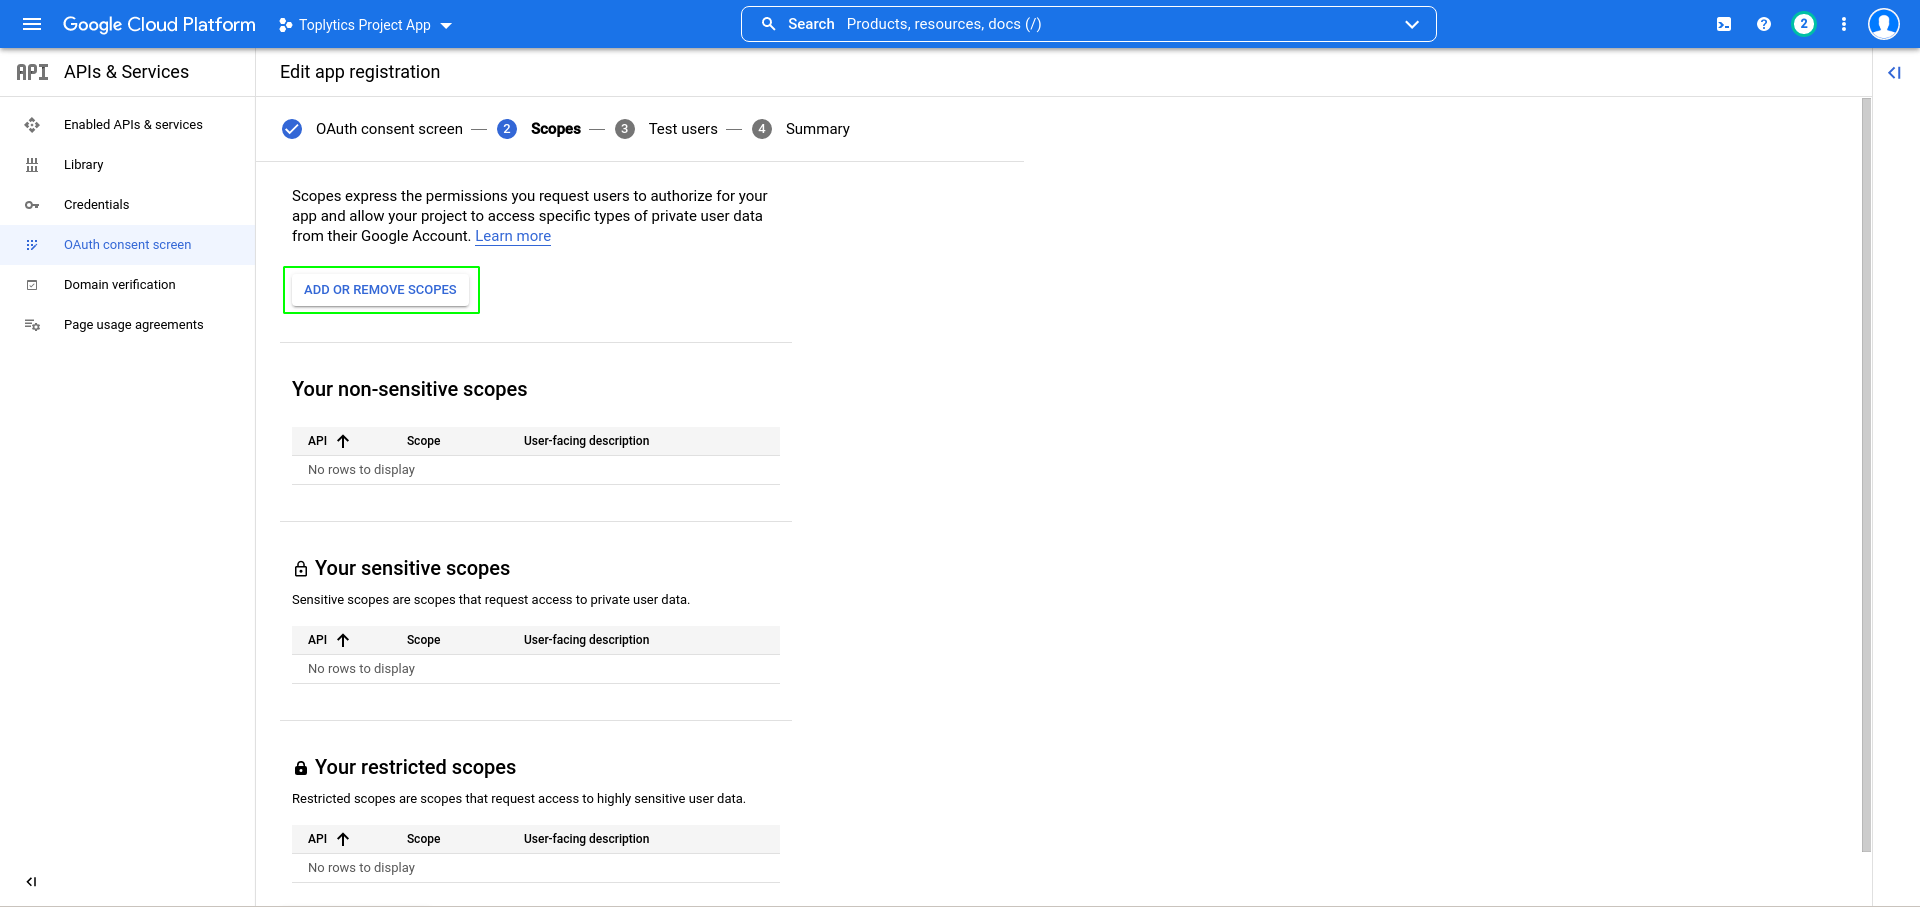
Here, you must add the Google Analytics Data API wich was enabled in 1.2 Enable the Analytics API step. So, click on the Add or remove scopes button.
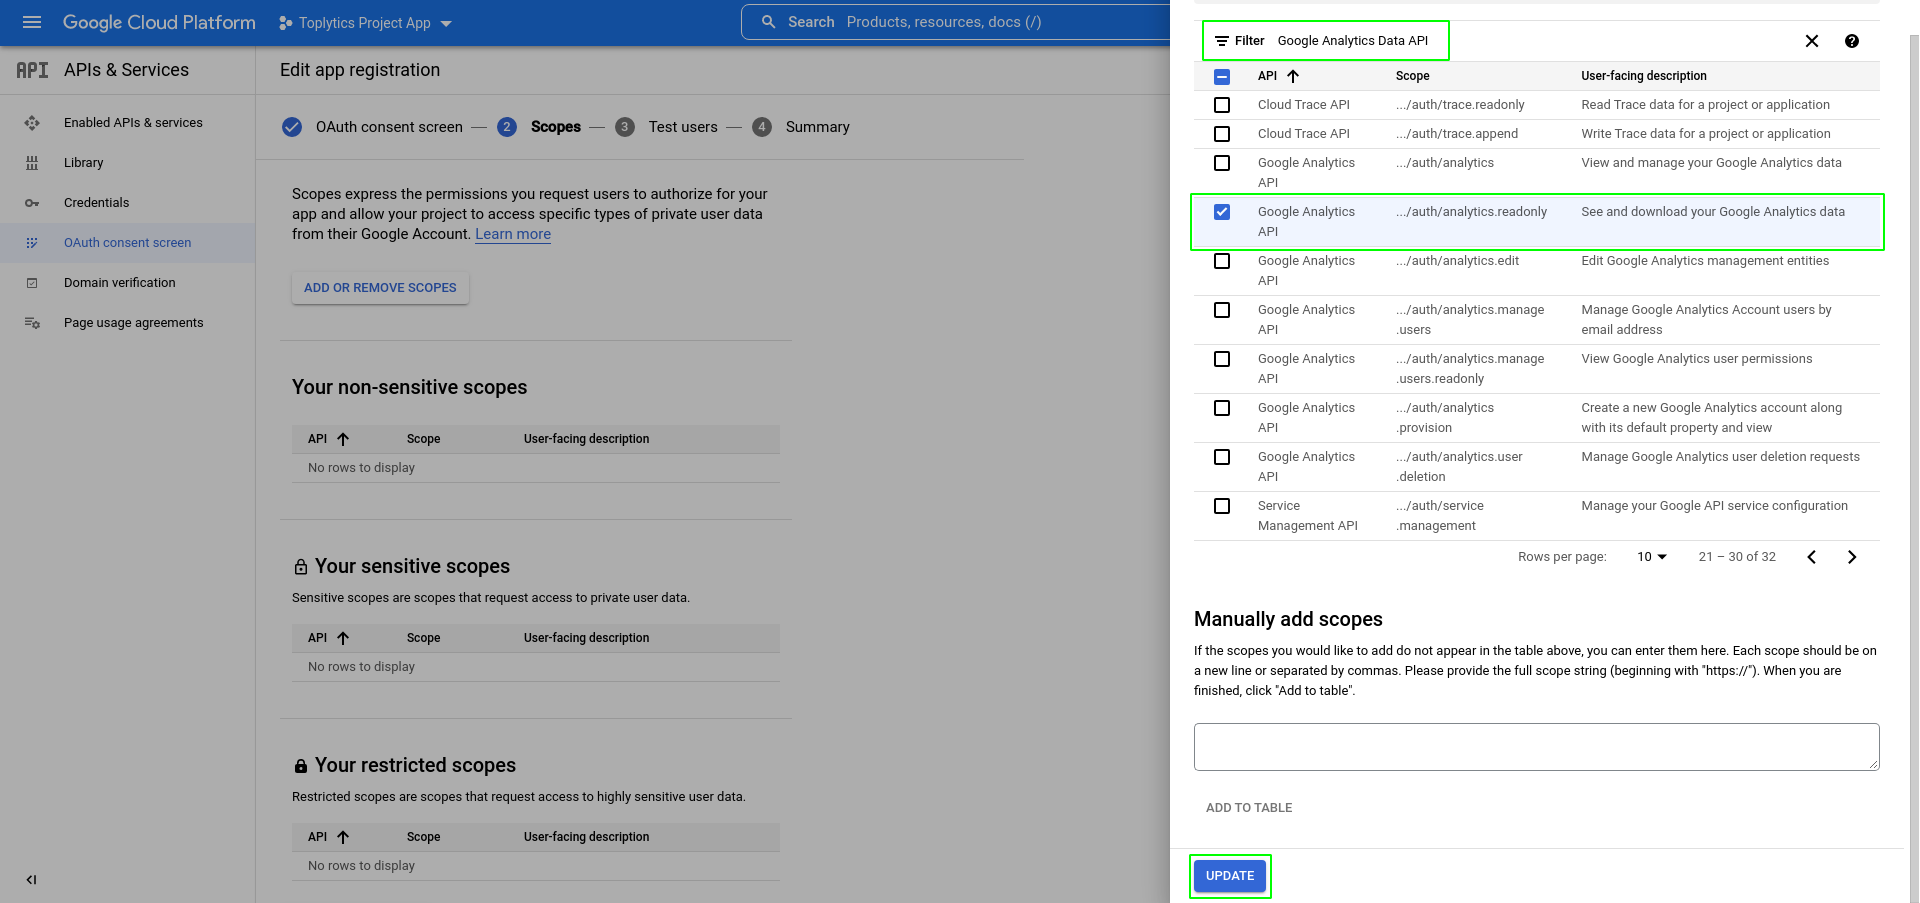
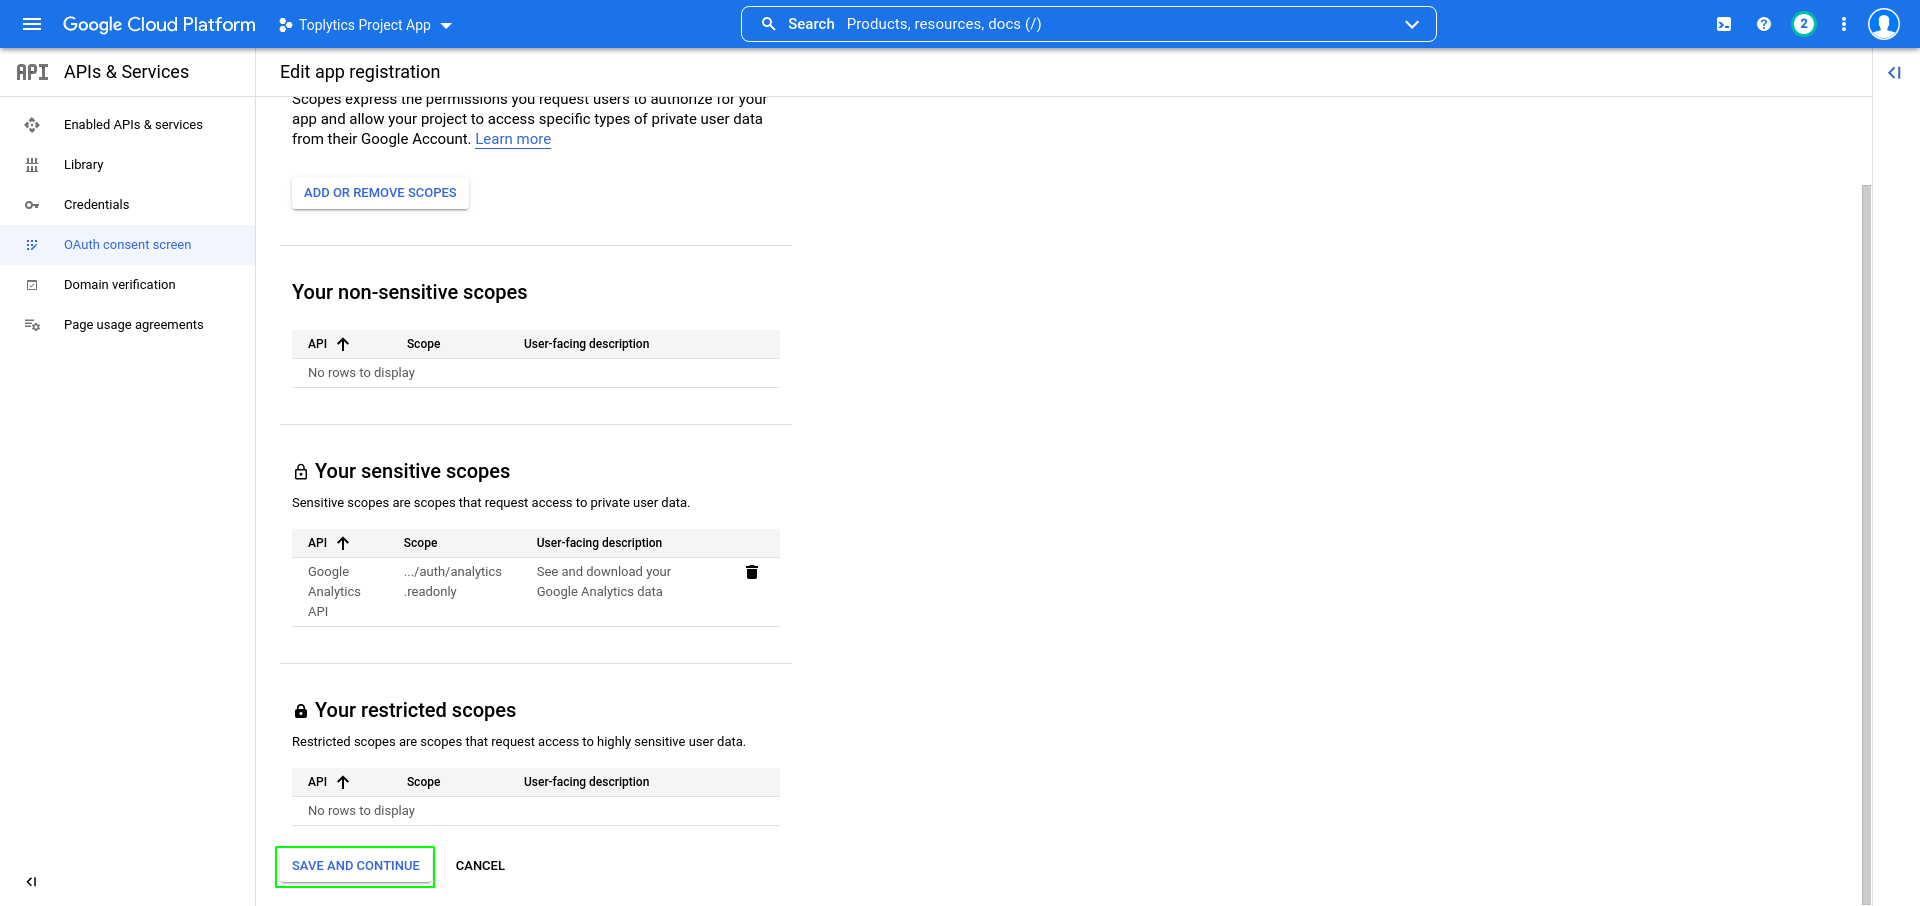
Search for the Google Analytics API and choose readonly scope. Click on Update button and then click on the Save and continue button.
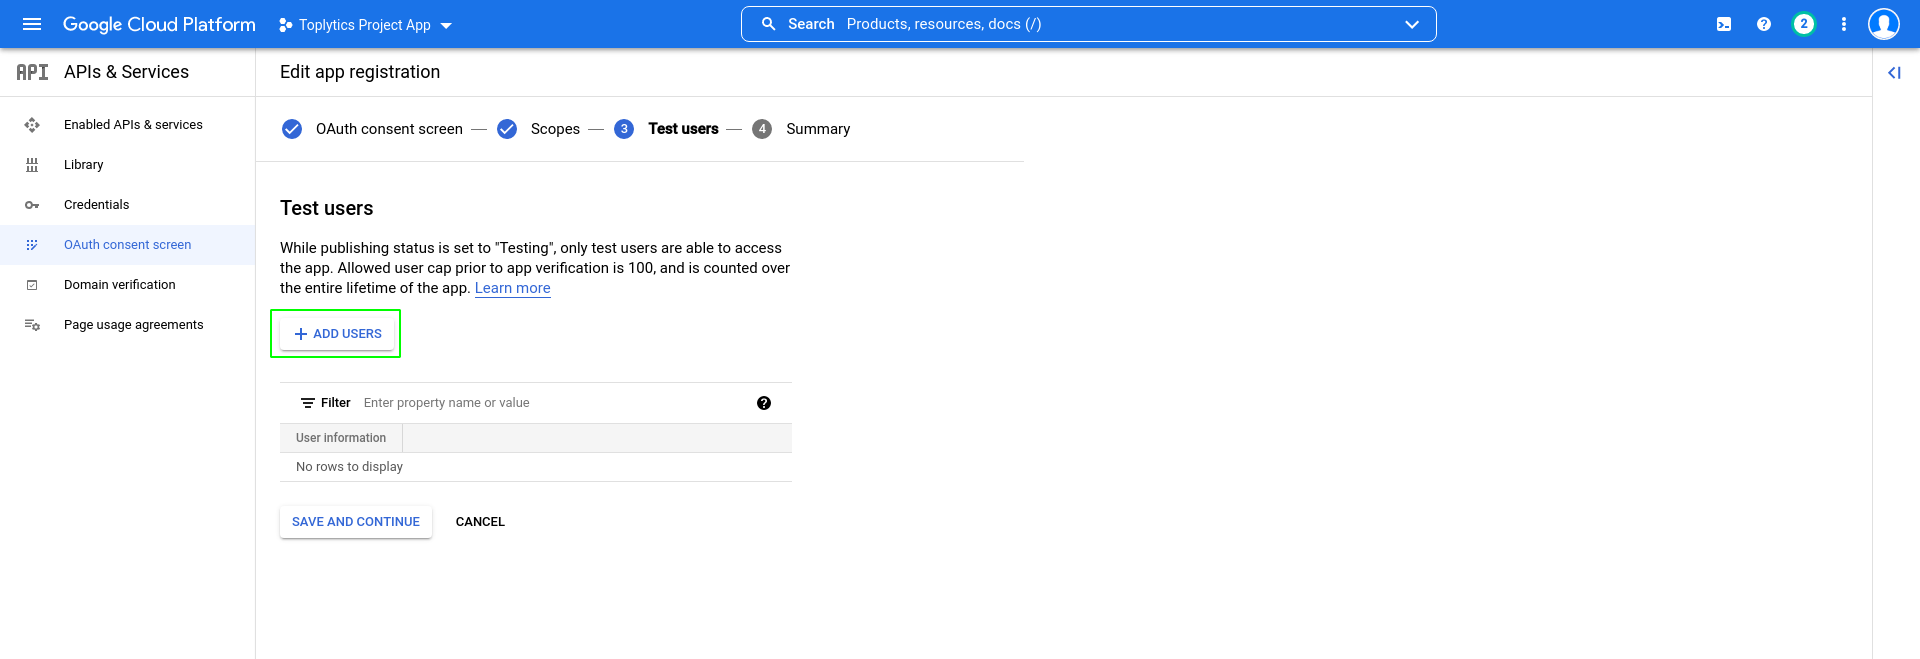
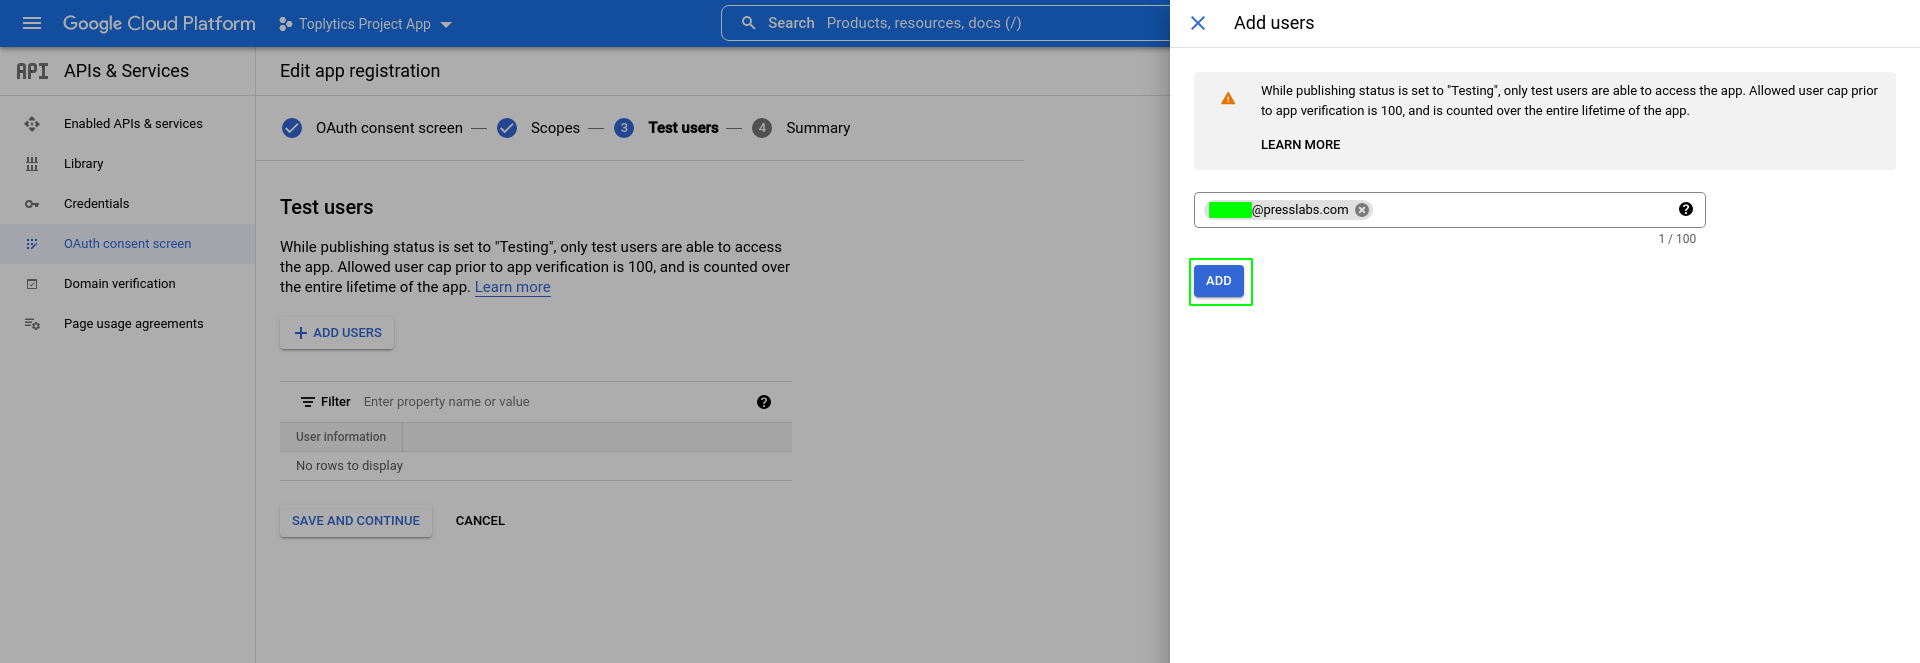
In the next step you must add the test users. Click on the Add users button and add the user account used for login or the user account with you have acces at Google.
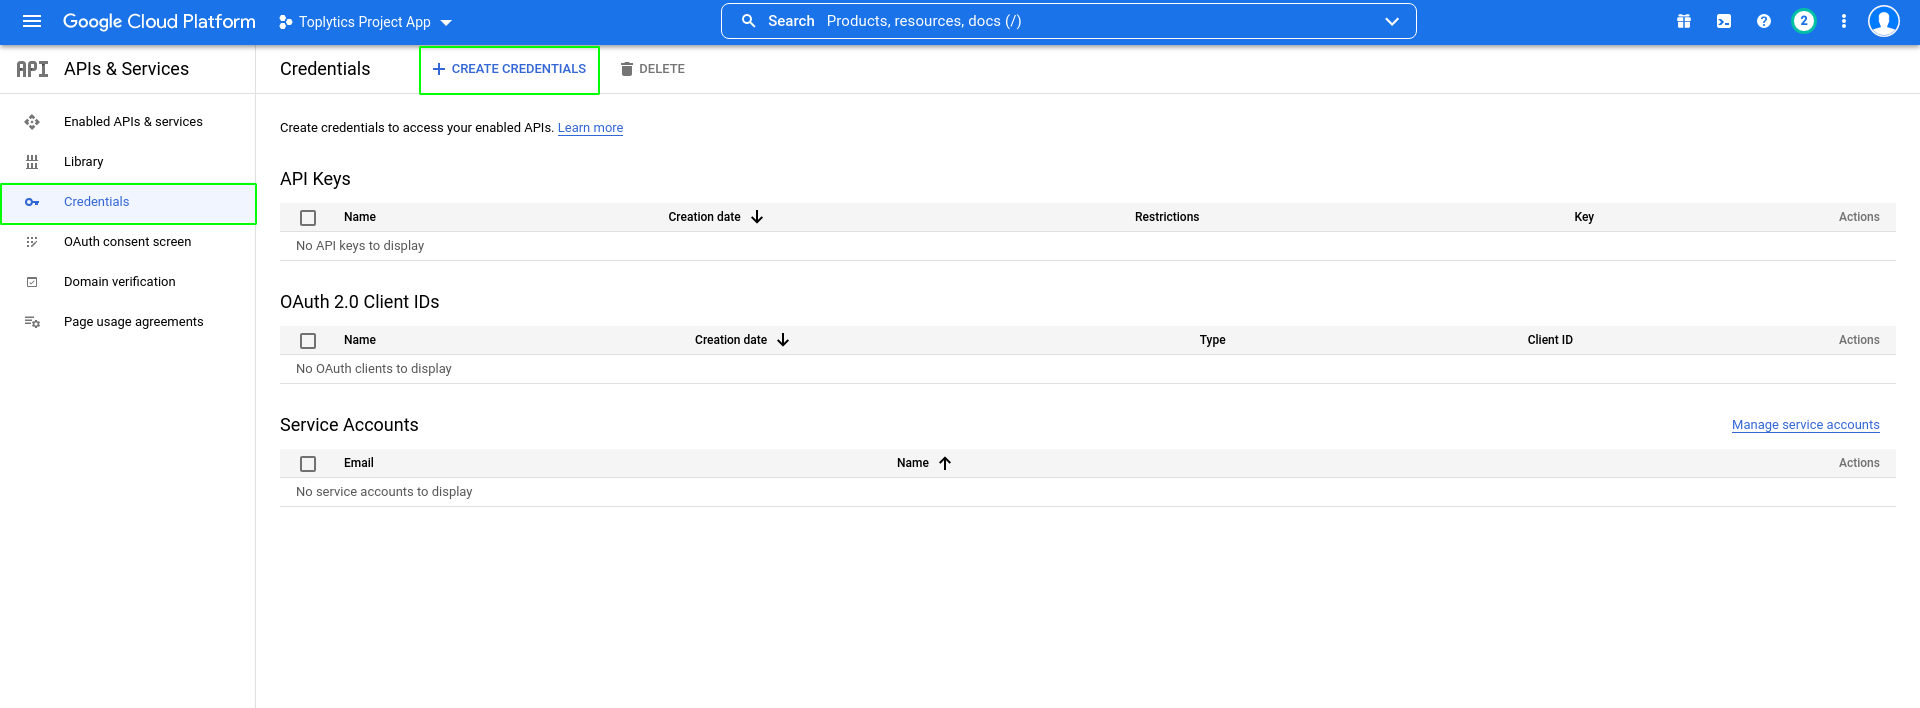
After you set up previous steps, you can create your credentials. Go back to the Dashboard section. Click on the Credentials option and then click on the Create credentials button.
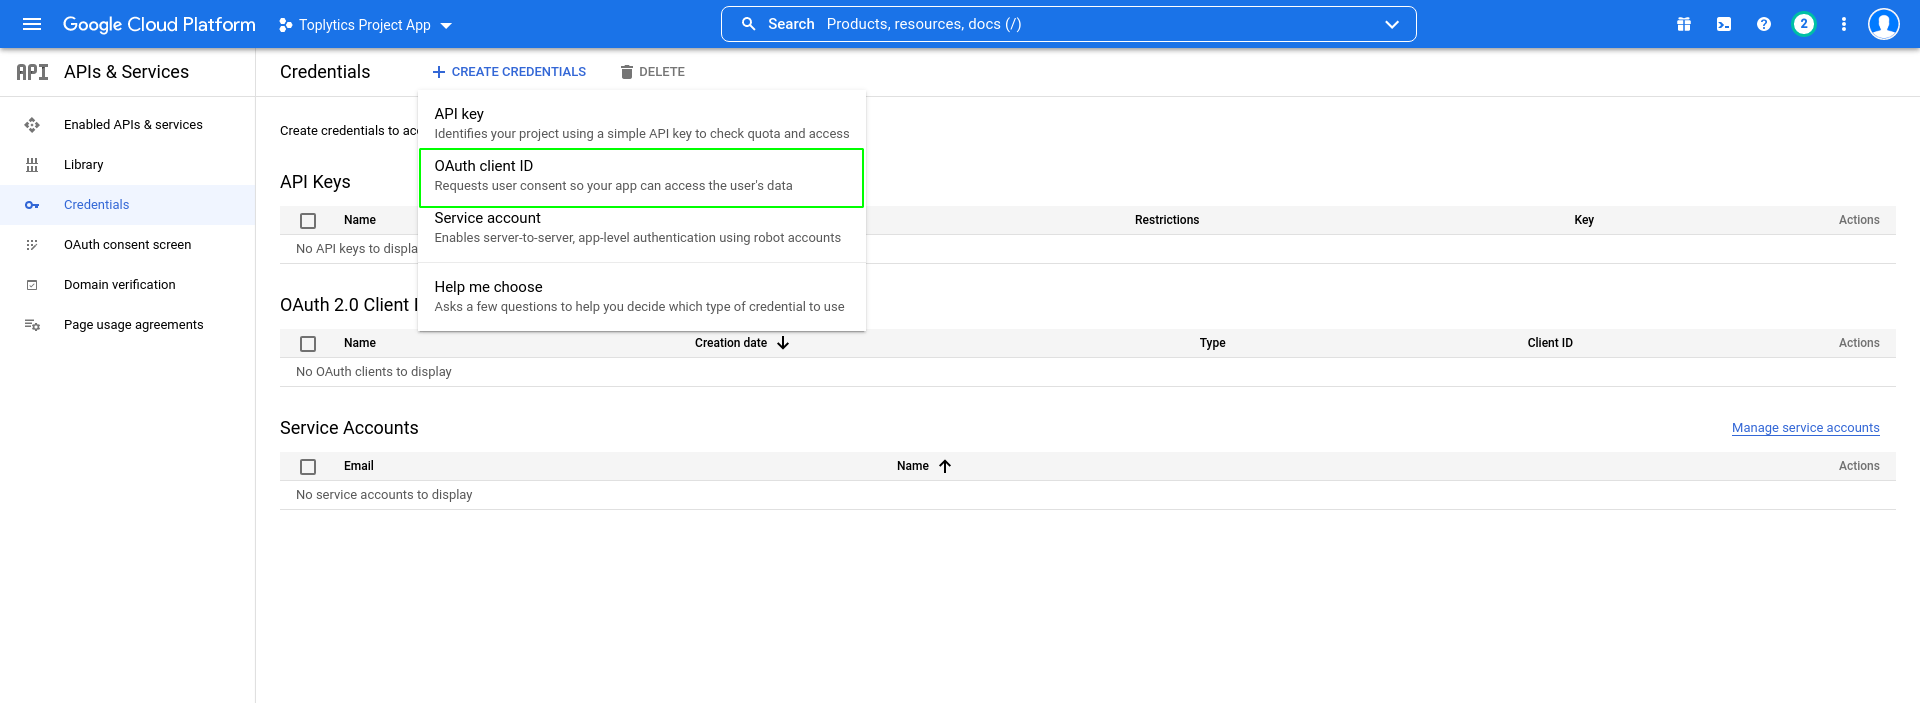
Choose the OAuth client ID option.
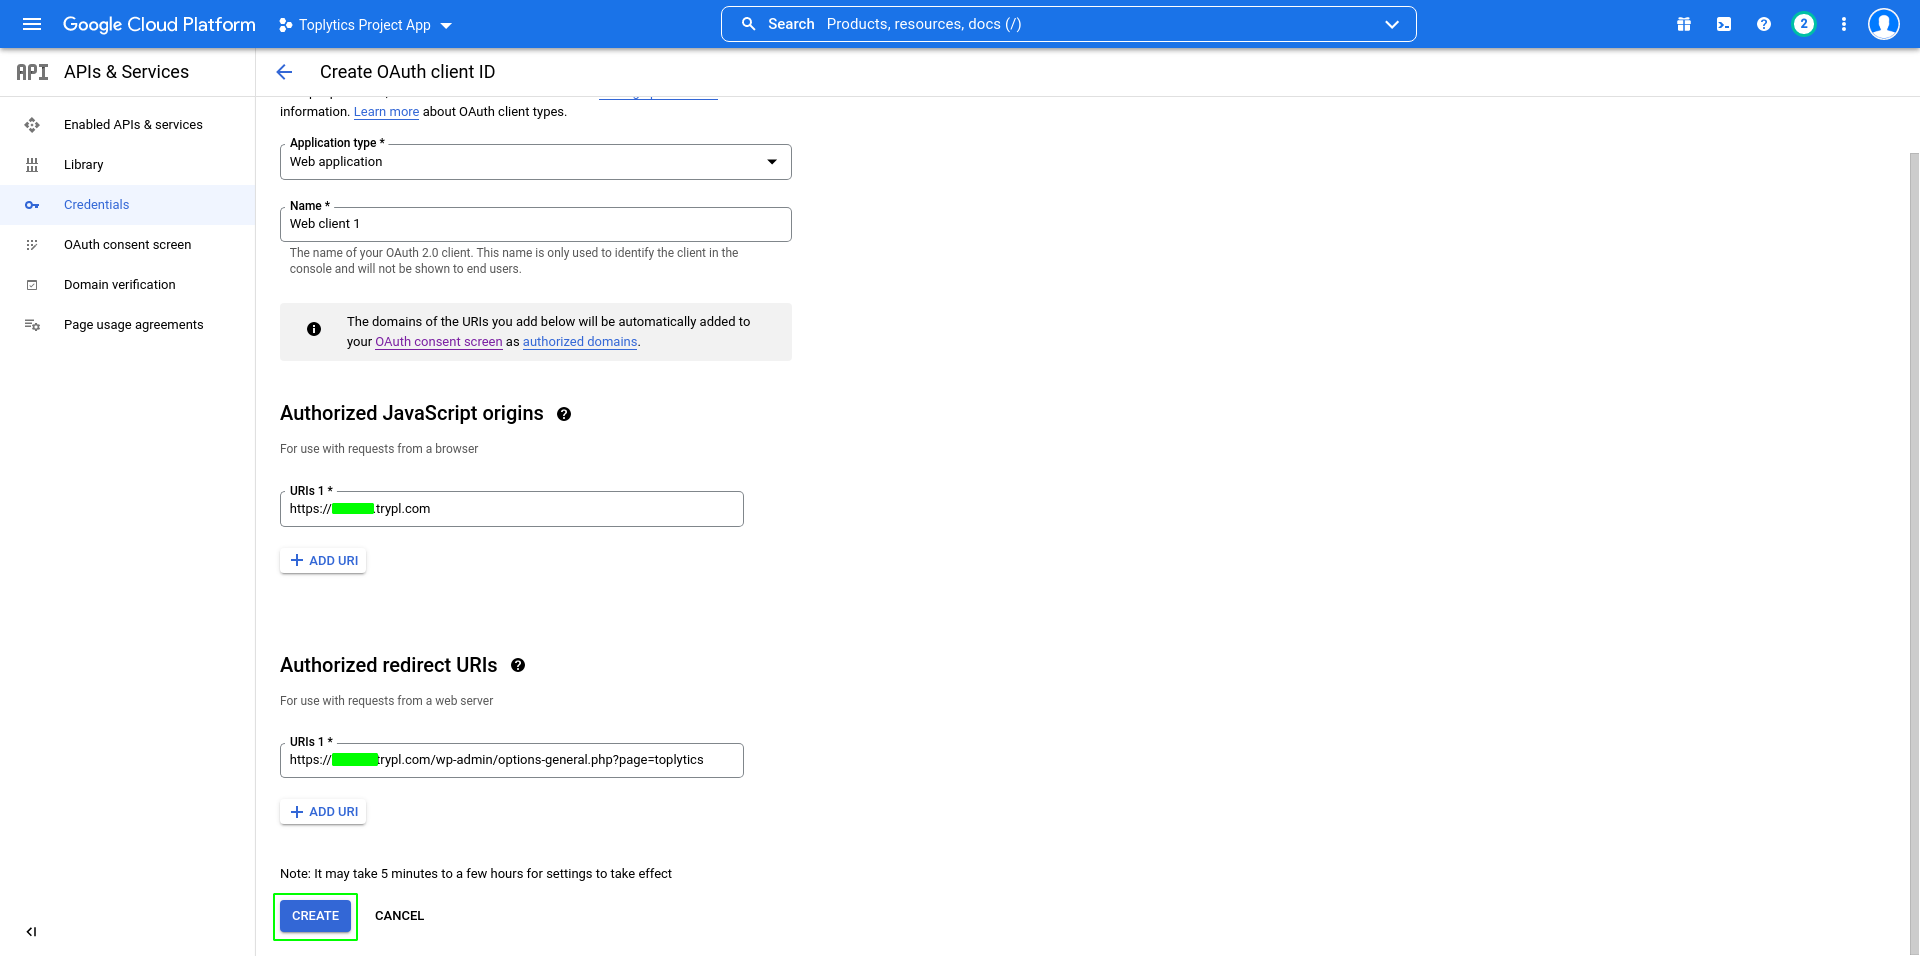
When asked to choose your application type choose the Web application option.

You will be asked to introduce the Javascript Origins and Redirects URI’s. As Authorized JavaScript Origins introduce your domain name, and as Authorized redirect URI you need to introduce the
Redirect URL
from Settings -> Toplytics -> Private Authorization and then click on the Create button.
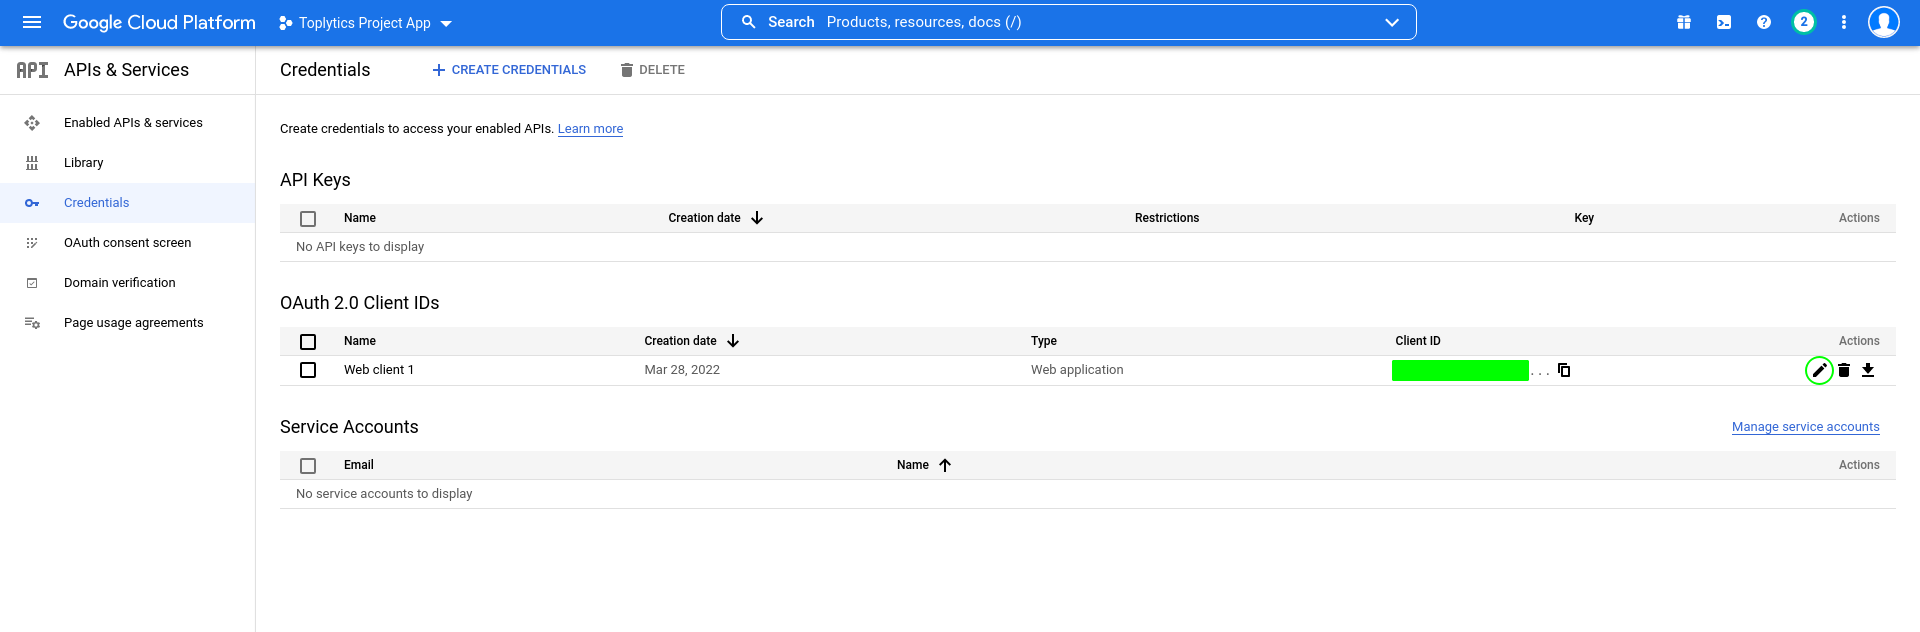
Your newly created credentials will appear on the Credentials page and the Client ID and Client secret you need to authorize the Private Authentification will appear in a pop up. You can also see them by pressing the Edit OAuth Client button from the Credentials section.
Step 2: Authorizing Requests
Copy the Client ID and the Client Secret keys from the Credentials section, then go back to Settings -> Toplytics -> Private Authorization to paste these credentials. By using these keys the client application will avoid sharing the username and/or password with any other Toplytics users.
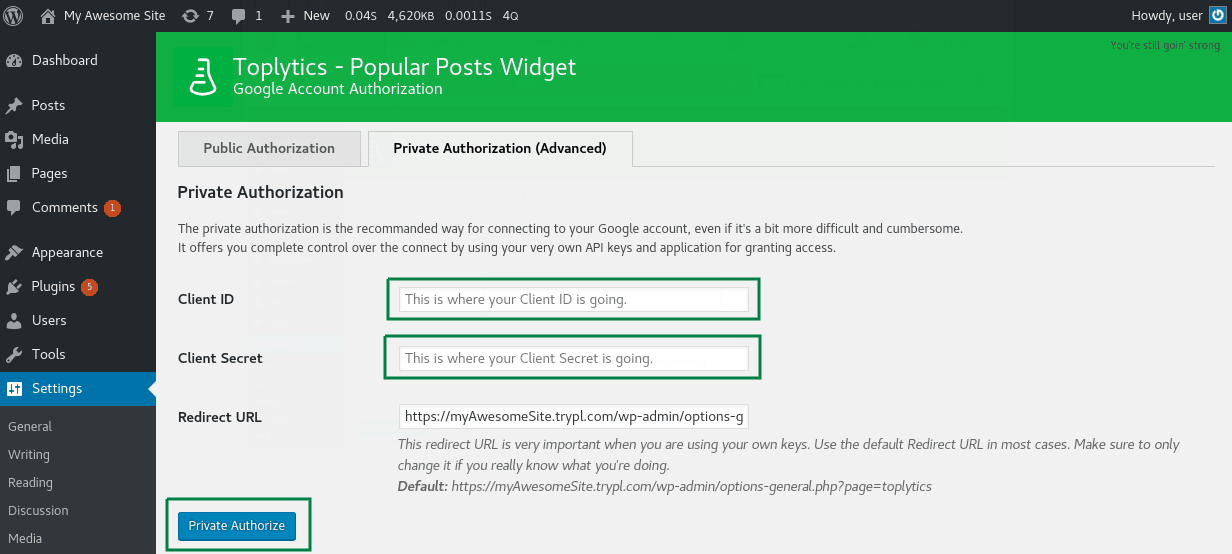
Click the Private Authorize button and after logging in you need to agree that the newly created app will access your Analytics data and you are all set.
You can select from the list of profiles the one you want to use for this site or you can disconnect your Google account. Make sure you have a Google Analytics profile set up, otherwise a warning message will appear that there are no profiles on the selected Google account.
Now you are all set to use Toplytics to display your most visited posts.