Gitea Development
This is a short introduction to our Gitea-based Managed Hosting Dashboard which offers easy to manage repositories through a visual, user-friendly interface. HTTPS and SSH access guaranteed.
It resembles the Github development platform, and additionally, it allows you to keep track of your remote repositories, as well. If you are interested in our journey from SFTP to Gitea, check our blog article Our Experience of Replacing SFTP with Gitea .
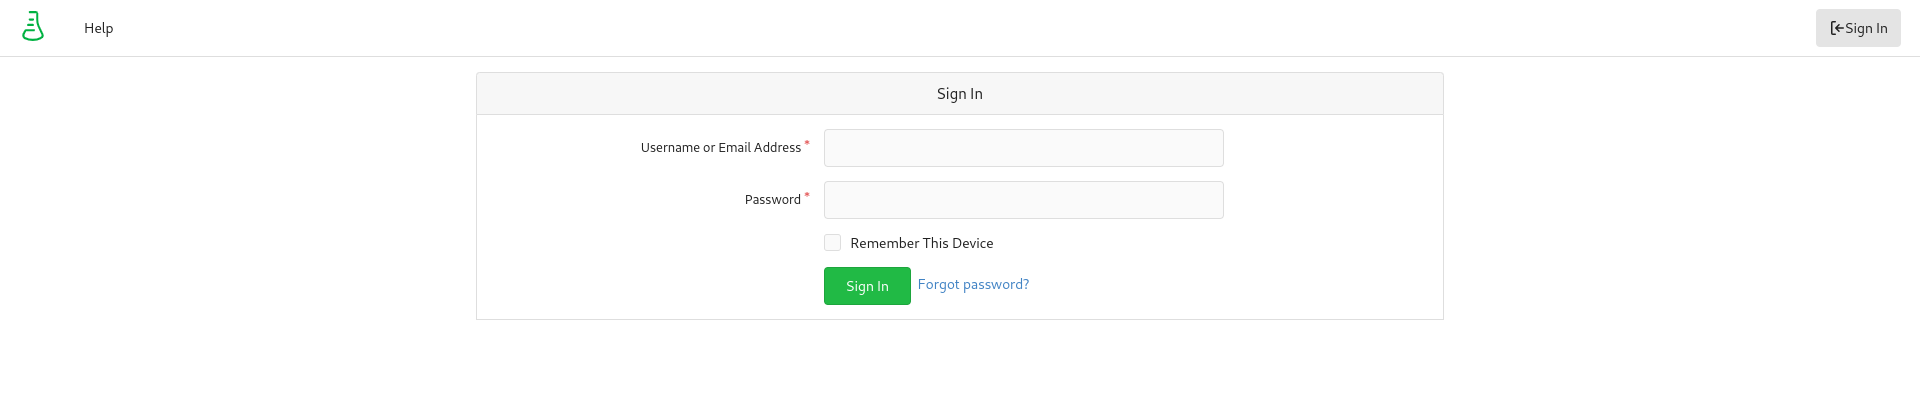
How to Sign in
To sign in, simply access the https://git.presslabs.net/user/login link and enter your Presslabs account credentials.
Learn More about Gitea
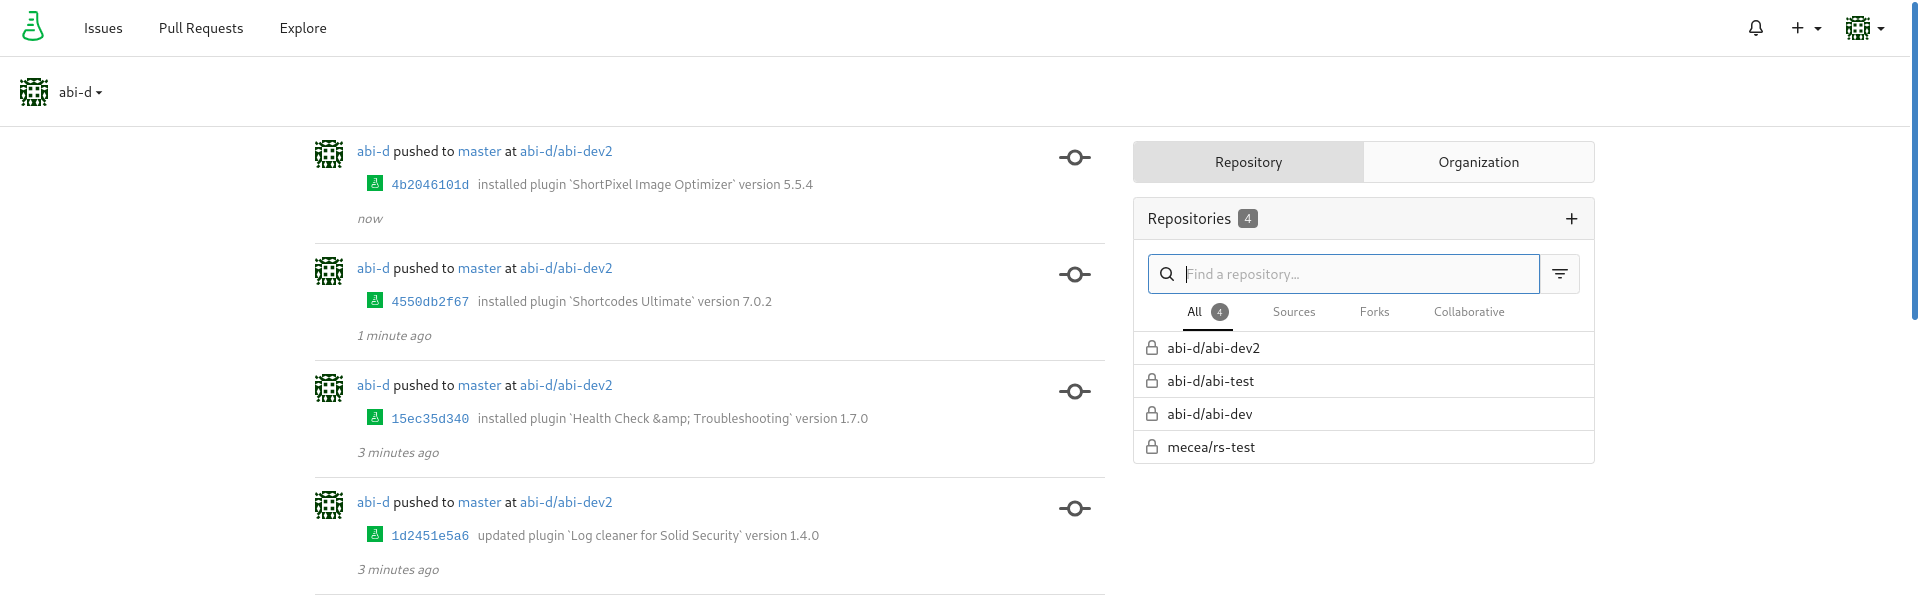
On the left side of the Managed Hosting Dashboard you can see the changes that have been made, and on the right side you can find a list of all your repositories (sites).
Accessing one of your sites will take you to its corresponding repository, as seen below.
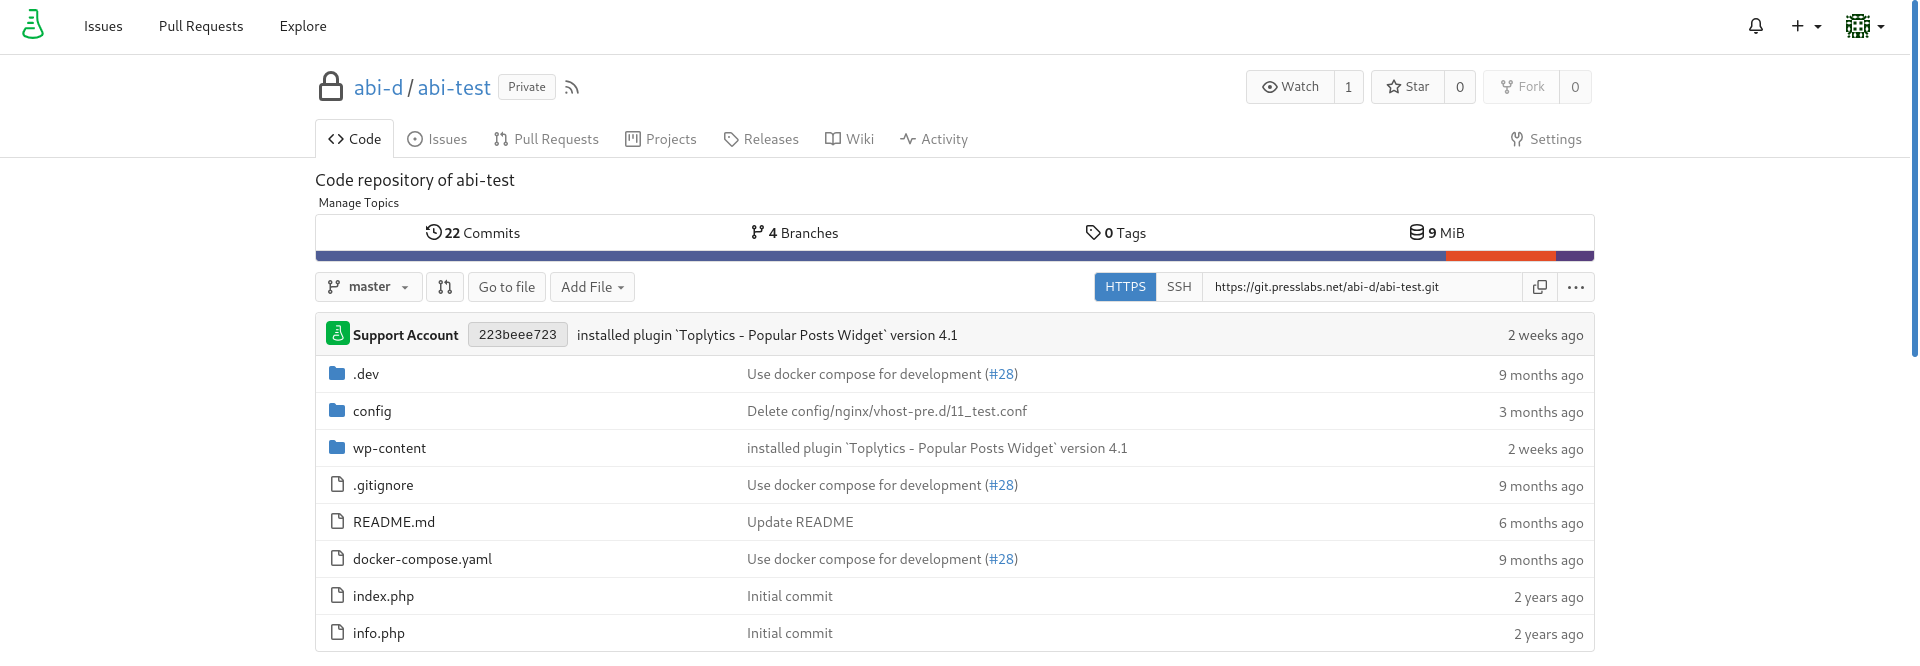
Here you can see your site’s source code, and you have the possibility to make changes. The source code can be found in the Code section.
You can add a new file by clicking the Add file button, and you also have the possibility of uploading a new file by clicking the Add file -> Upload file button.
In case you know git commands and want to work from the command line, you can clone your instance’s repository locally through SSH or HTTPS, using the links provided in the top right side of the window. In order to have the right to download an instance, you need to be a collaborator on the repository and this can be set in the Managed Hosting Dashboard, Collaborators Section of each site.
You also have the possibility to download the repository using the Download this repository button.
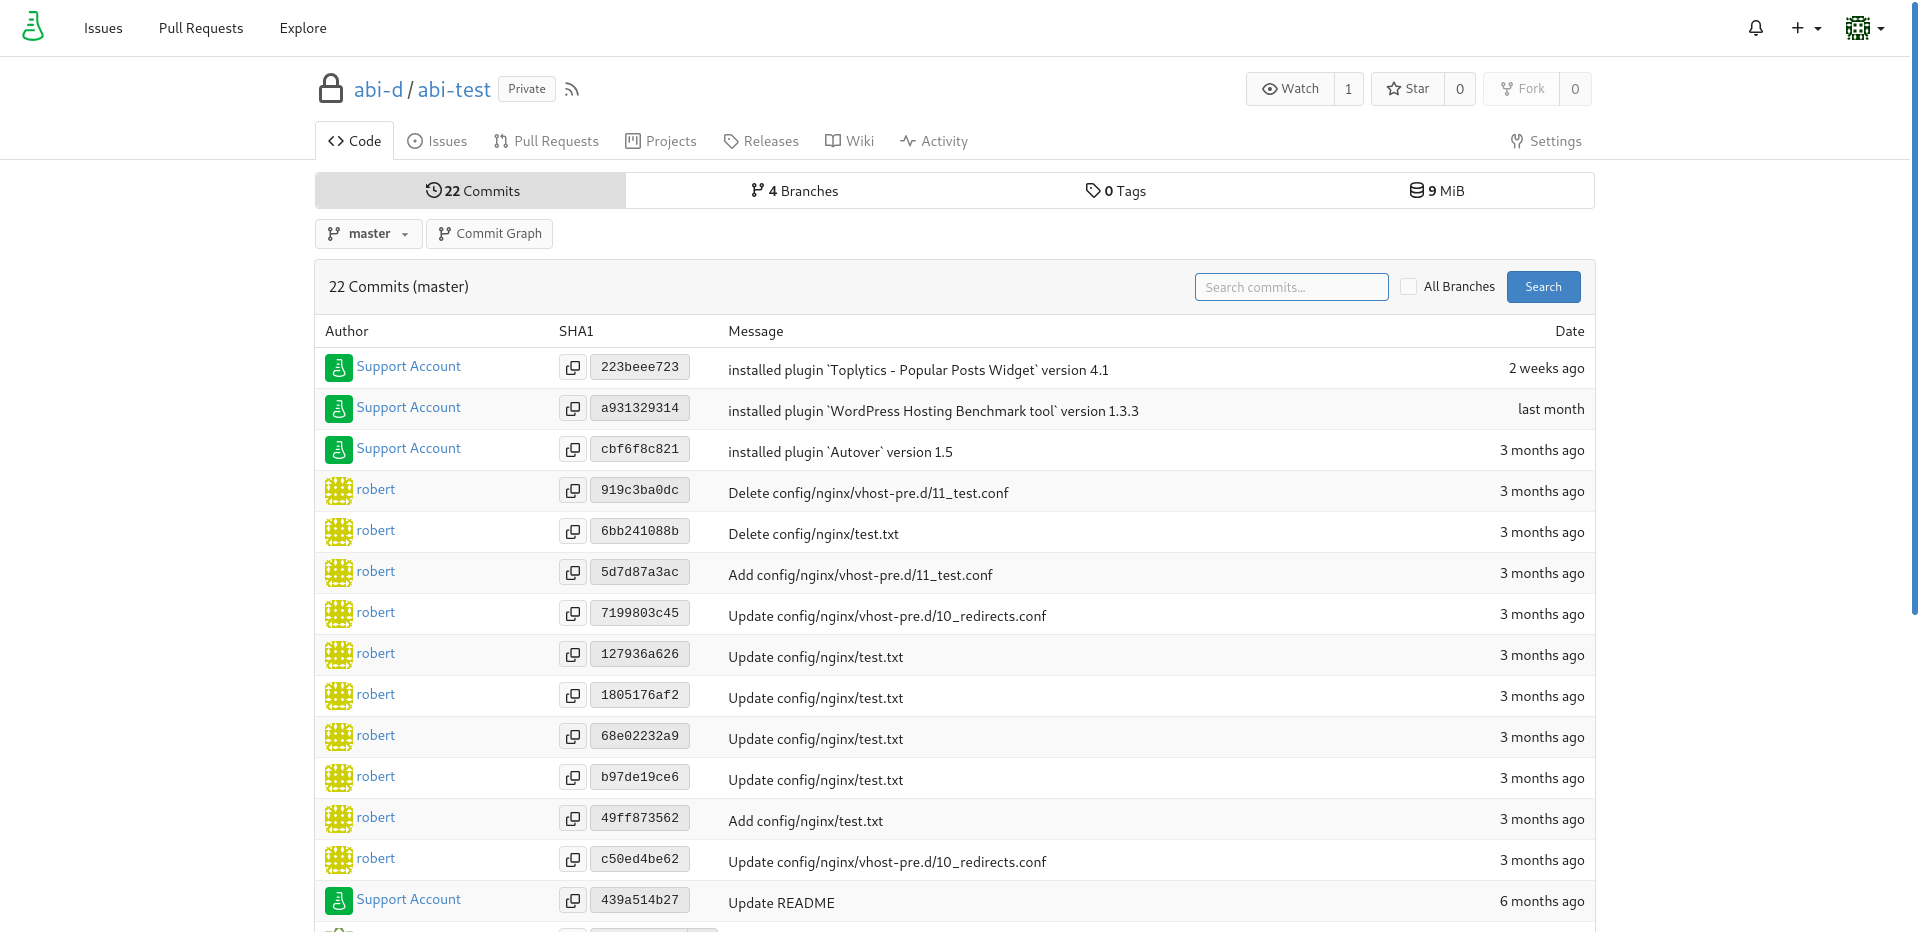
You can also see all the commits made on this repository by clicking on the number of Commits (50 Commits in the screenshot below) and if you click on them, you will see the corresponding details.
How to Commit Changes
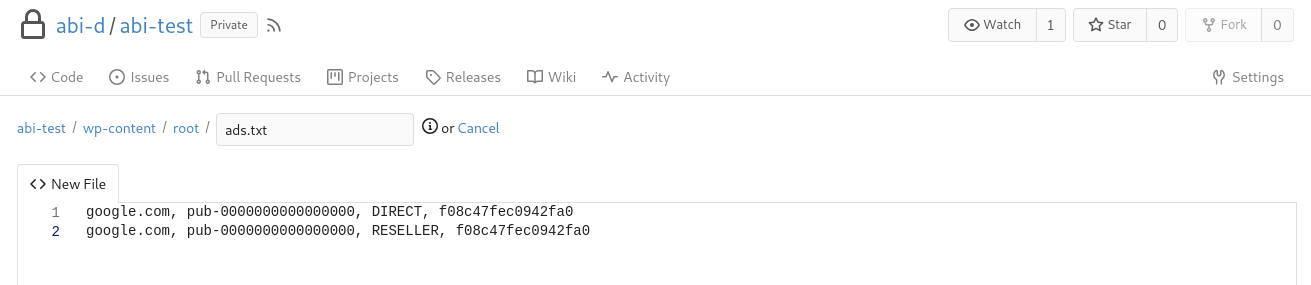
Let’s say you want to add the file ads.txt, which is now required by most Ad Networks. First of all, it’s important to know where to place the files, in order to show up in the root of your domain, e.g. yourdomain.com/ads.txt. The correct path for these files is:
/wp-content/root/
So go to /wp-content/root/ and, in order to add a new file here, you need to click on New file:
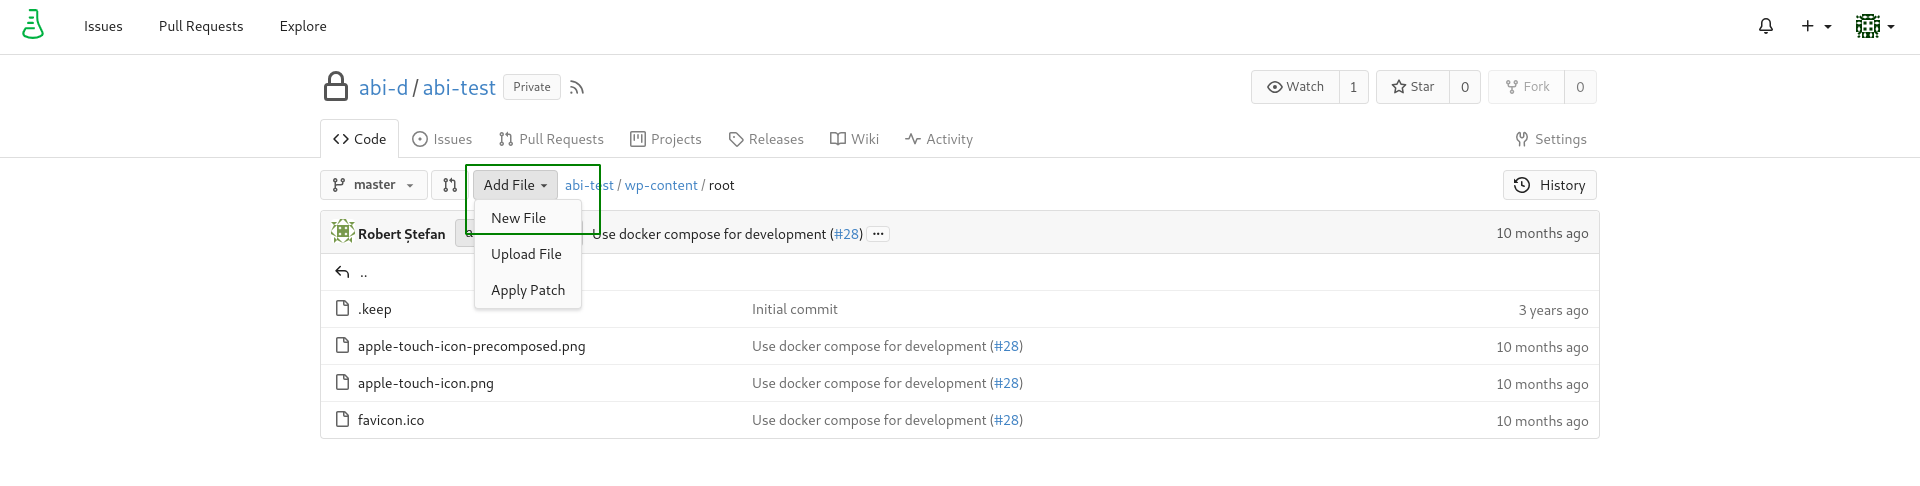
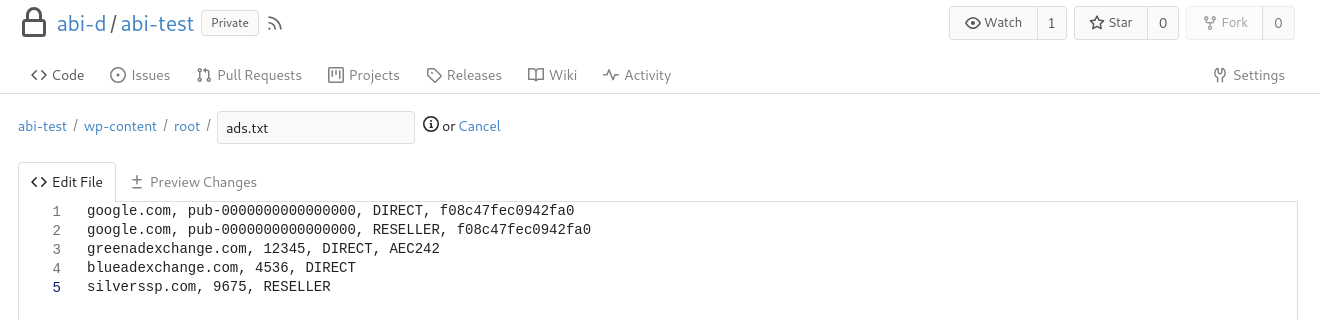
Then you need to type the name of the file (in our case, ads.txt) and enter the content, similar with the test content I added for this file:
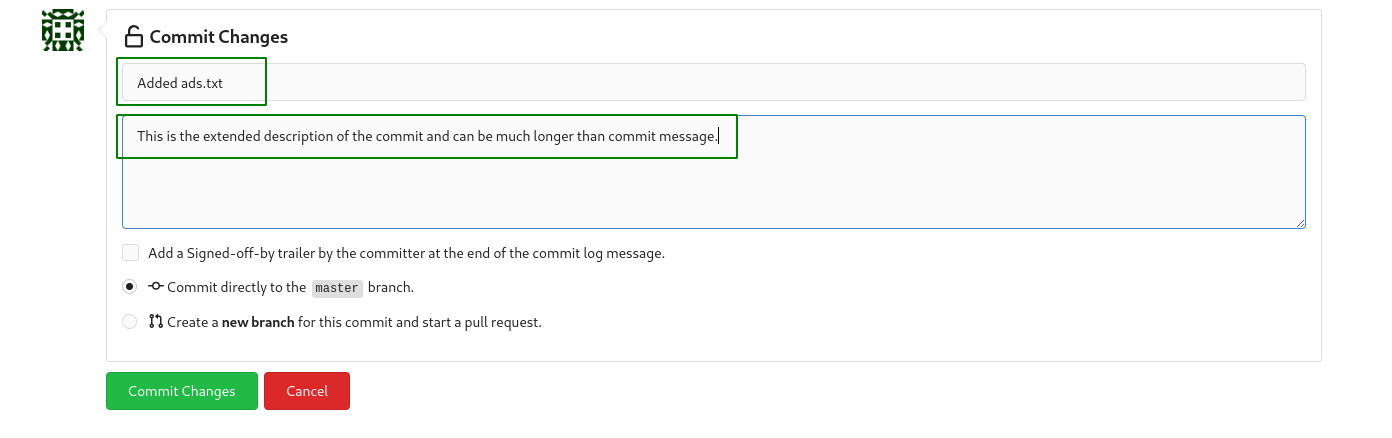
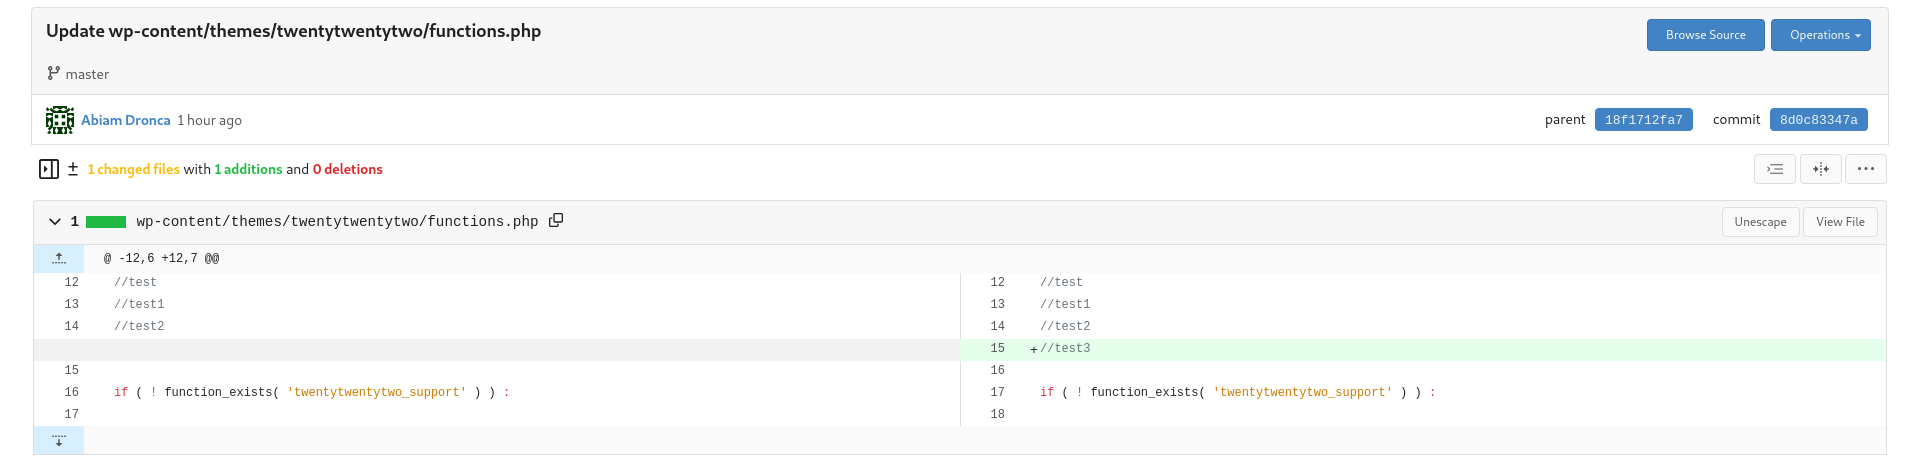
After finishing the changes, make sure you save them. In order to do that, at the bottom of the page, there is a Commit Changes button you need to press:
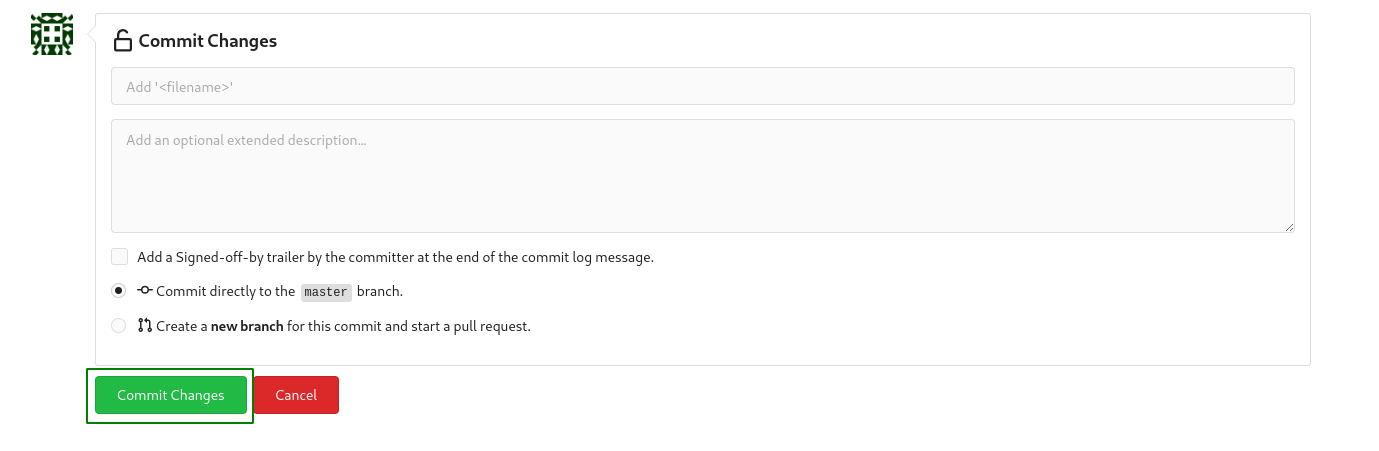
You can also add a custom message to your commit, and an extended description in the text-boxes shown above the Commit Changes button. Otherwise, the commit will be saved with the default message that is displayed.
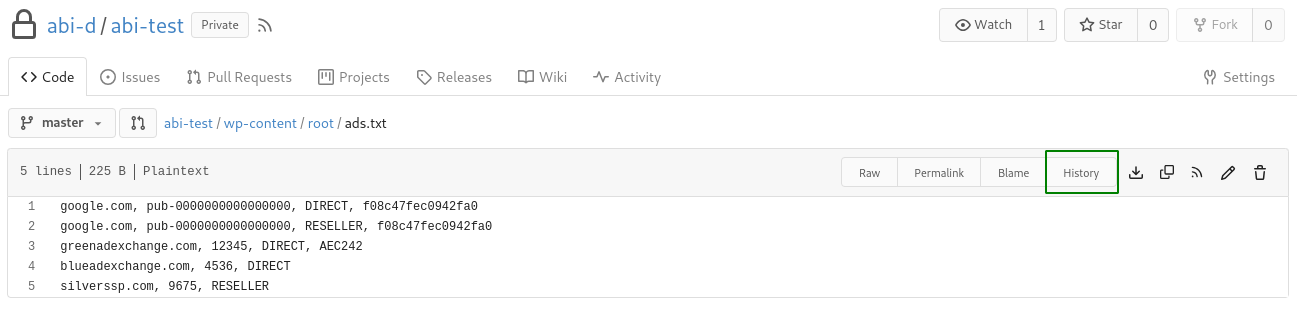
Now let’s edit this file, as you want to do some changes to your ads.txt file. For this, you need to navigate again to /wp-content/root/ and click on the file you want to edit (ads.txt, in our case), then click on the edit button in the right side of the screen as seen below.

You can make your changes inside the editor.
Next, you can commit the changes just like we did when adding the file, using the Commit changes button.
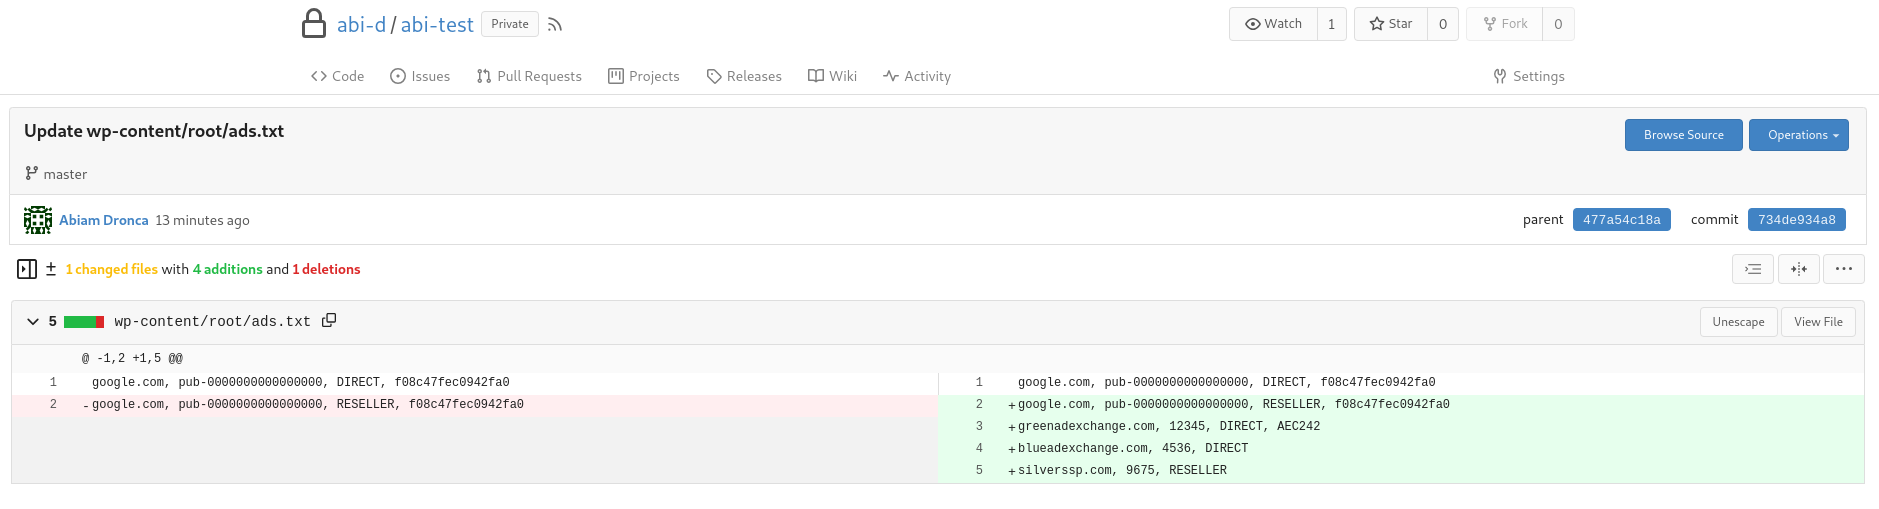
After saving the changes, you can see the commit by pressing the History link, which can be found on the right-hand side bar, framed with green color.
You will see a list of all the commits made for that specific file (ads.txt).
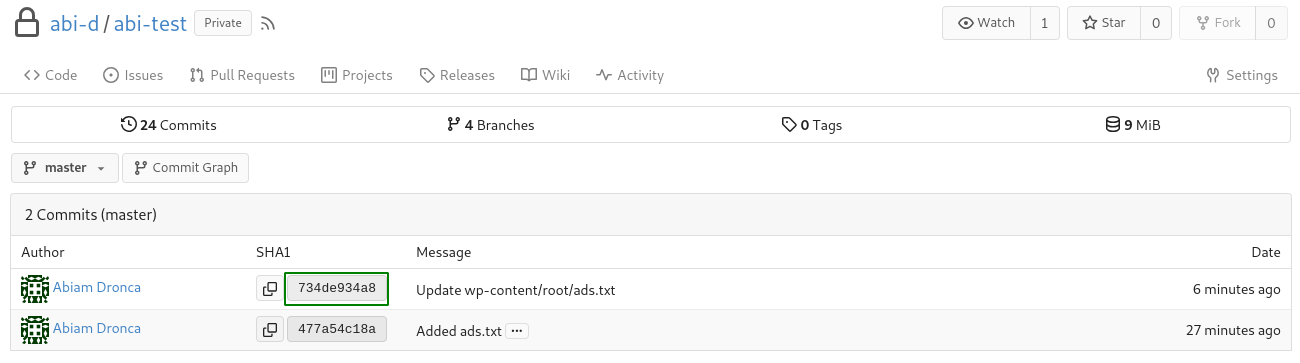
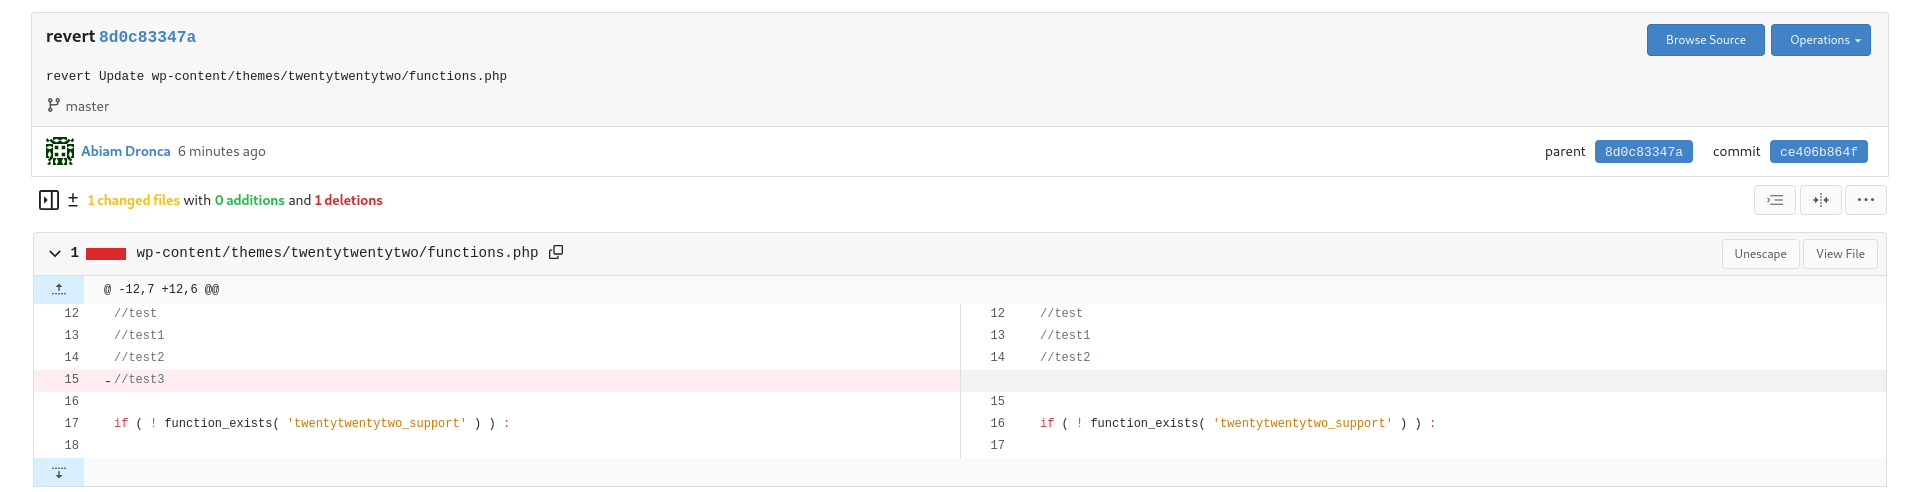
By clicking the SHA of a commit, you can see all the changes that have been made, as well as their author, and the total number of lines that have been added (with green) or removed (with red).
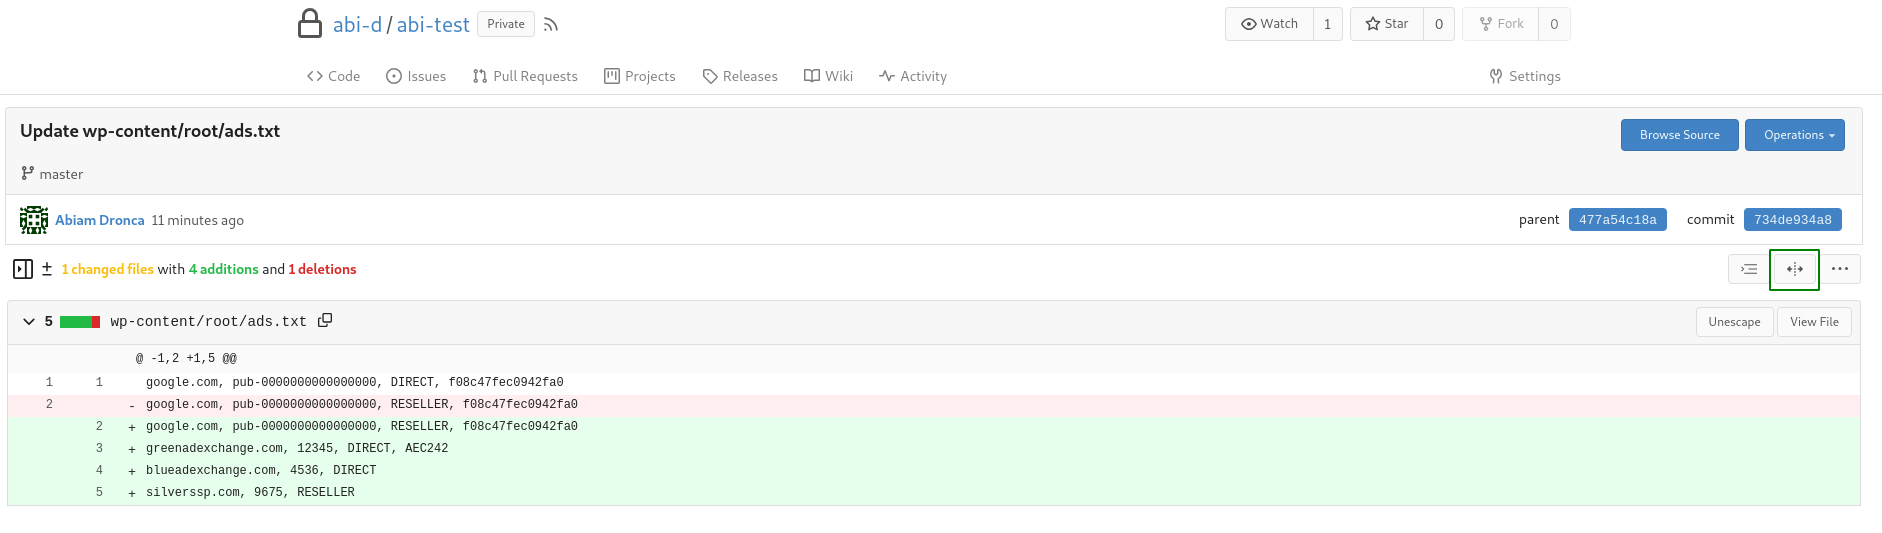
Below you can see the Unified view of the changes made, and by clicking the Split View button (framed by green color in the above image) you can see them separately as following:
Now you can navigate and check the file you just edited, at yourdomain.com/ads.txt.
Also, in the above commit section you can see the Operations button. By clicking it, you can see a scrolling list of operations that can be performed on the commit in cause.
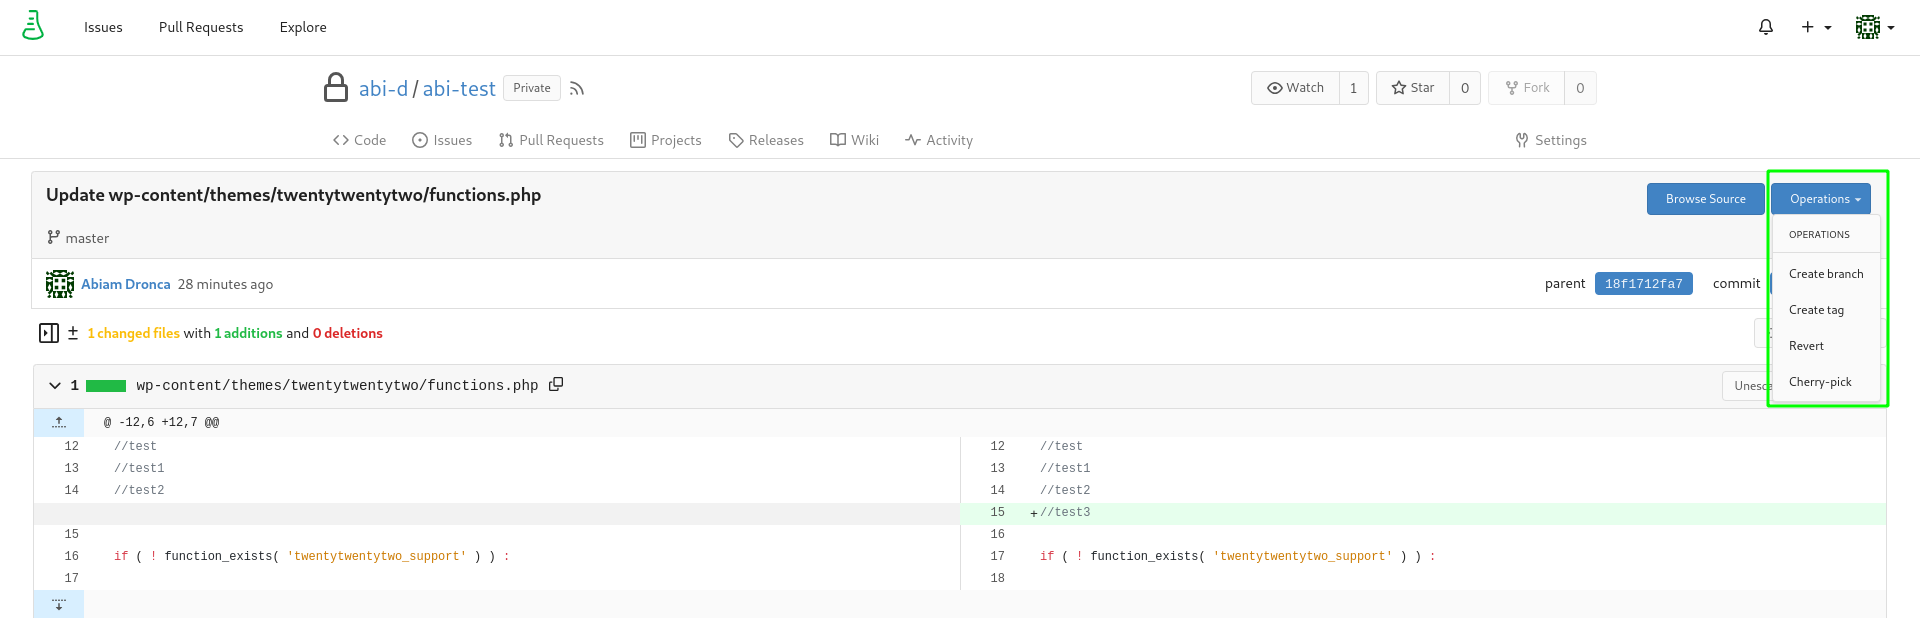
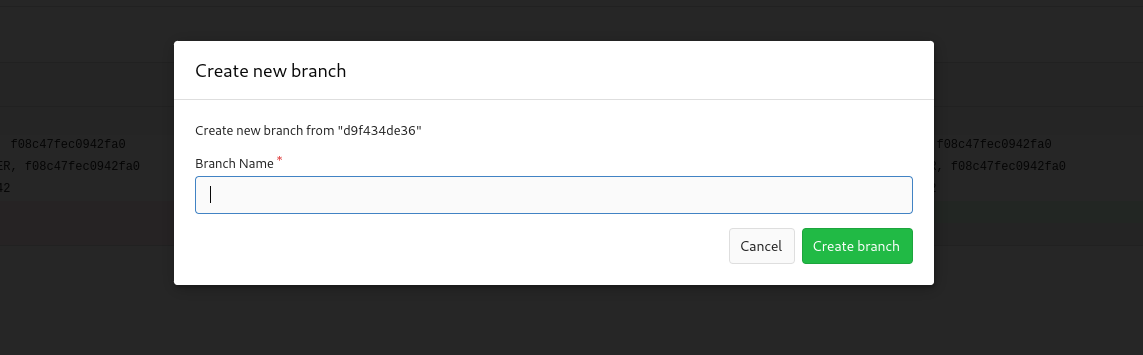
Create branch, as the name of the operation says, you can create a new branch.
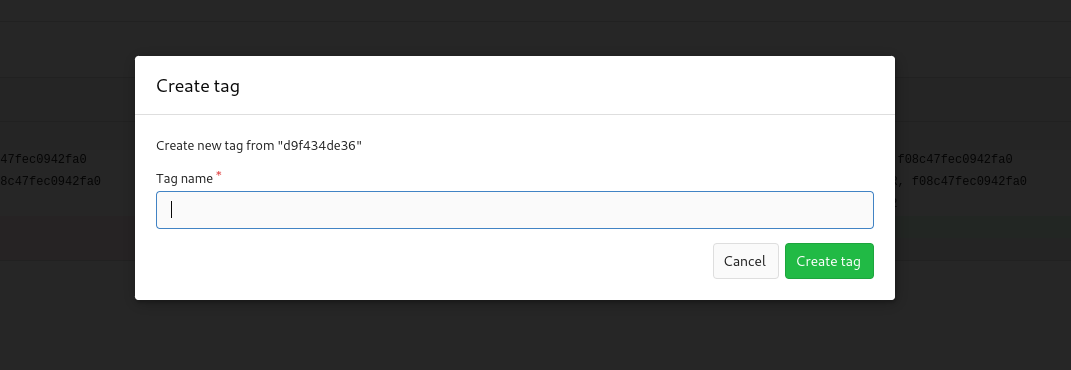
Create tag, where you can create a tag for the commit.
Reverta commit.
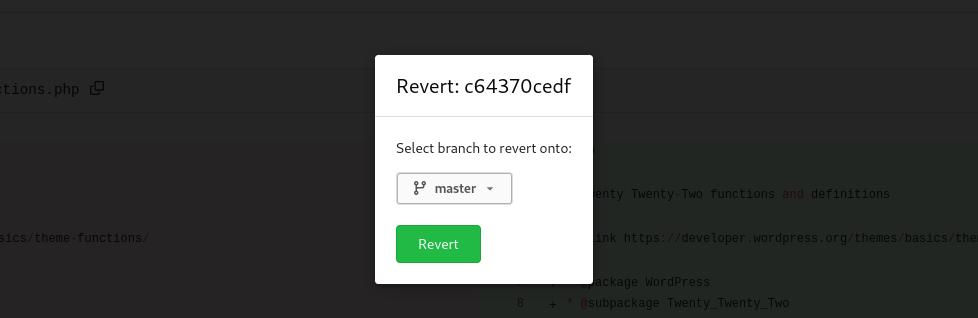
You can revert the latest applied commit:
How to Move a File to Another Directory
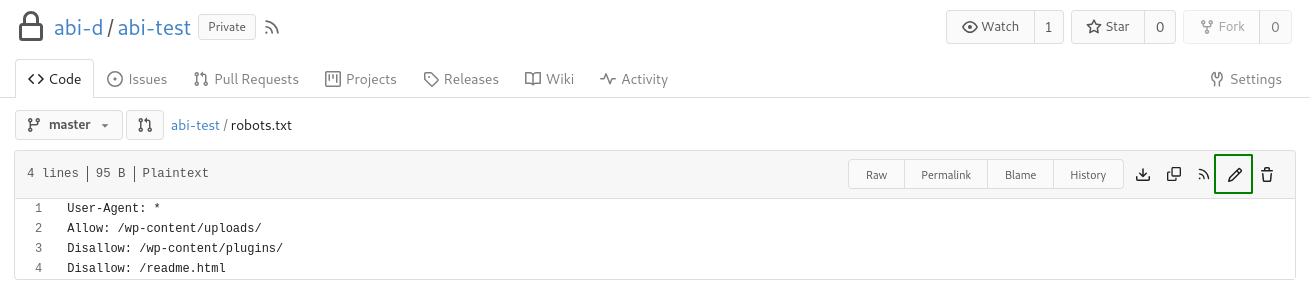
For example, let’s say you have a robots.txt file in your repository.
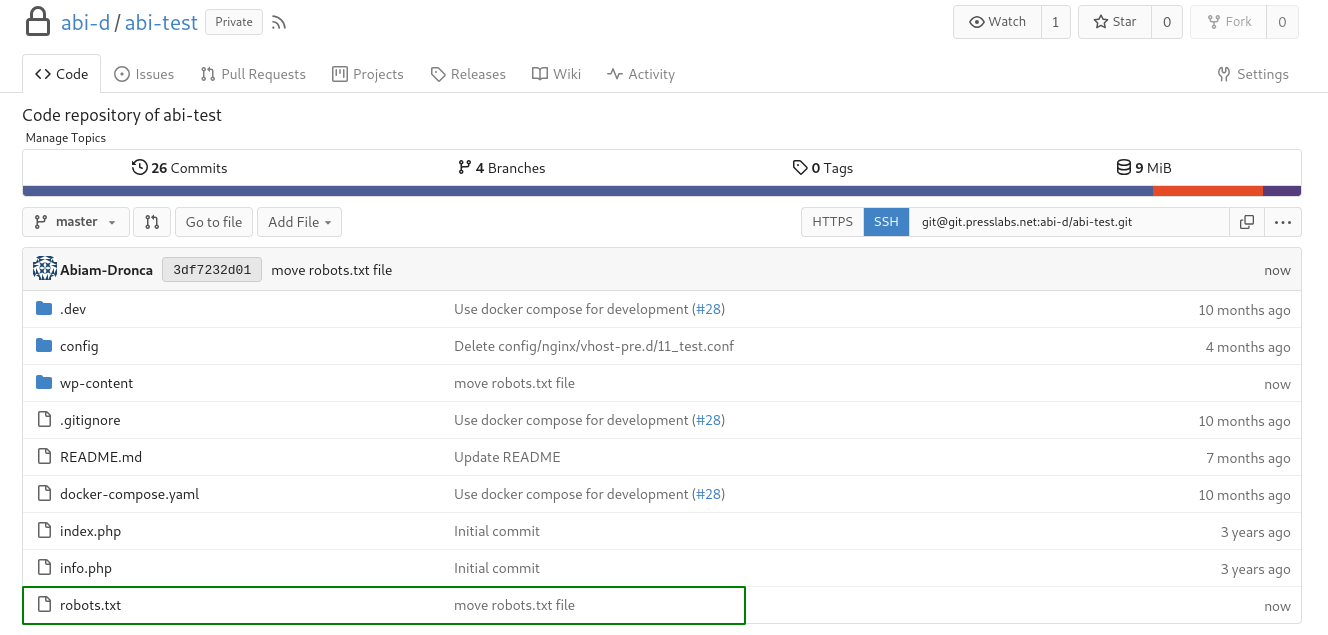
As you can see, it’s not where it should be, which is in /wp-content/root/ directory. In order to move it, you need to modify its path.
Go to the file you want to move and click the Edit this file button.
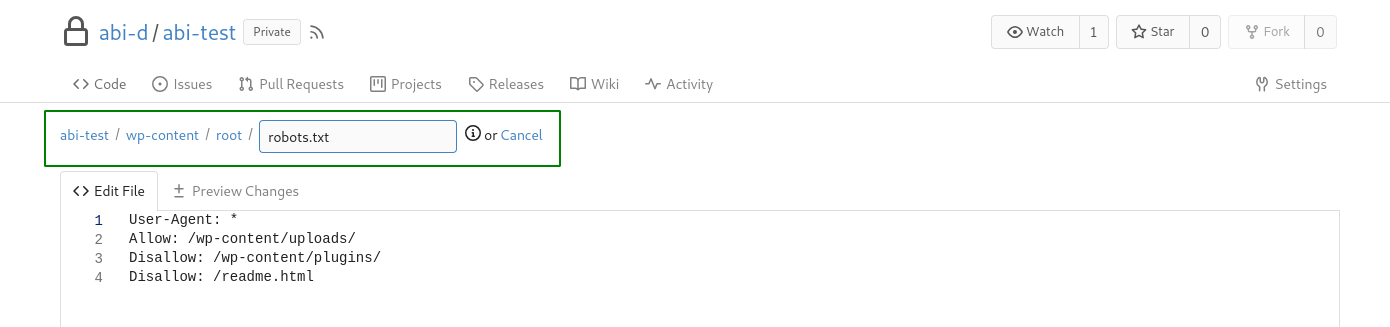
As you can see, now you can modify the path. As I have mentioned before, the robots.txt file should be in /wp-content/root/ so I will write exactly this path: /wp-content/root/robots.txt. Notice that every time you press /, the directory will become part of the path marked with blue font, and in order to go back and modify this path simply press the backspace key.
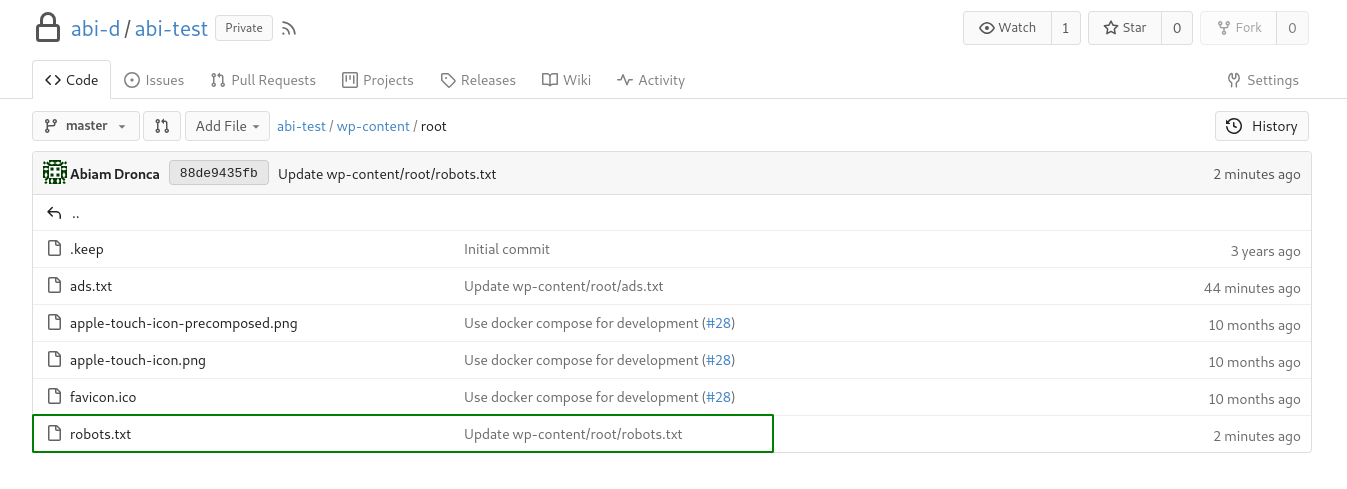
Now go to the bottom of the page and click the Commit Changes button and check that the robots.txt file is now located in /wp-content/root/.
How to Remove a File or a Directory
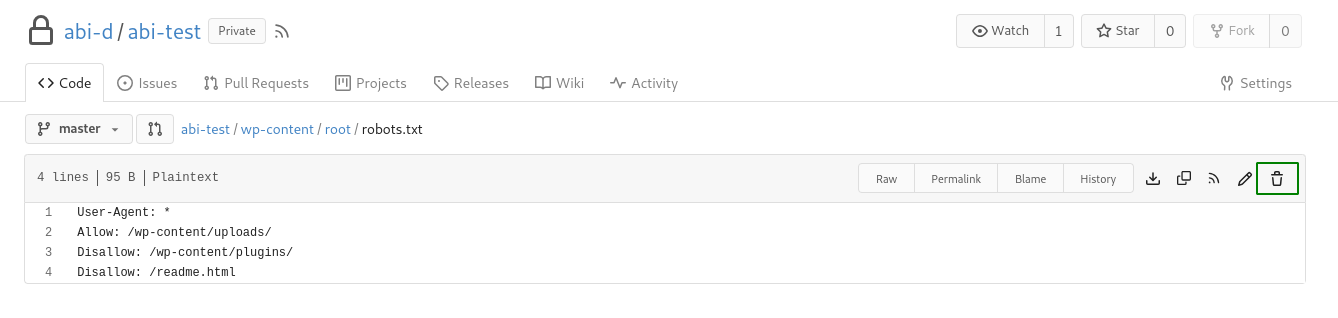
To delete a file, simply go to the file in question and use the Delete icon.
To remove a directory, you need to remove all its files one by one, after which it will disappear automatically.
FAQs
Where can I see who has made a change to my site’s code and when?
The code of all the sites hosted with Presslabs is stored on our Git servers stack, which keep track of all the changes made to your site’s code, as well as the users who made them. You can see these changes both in your wp-admin, in the Gitium plugin, and in our Gitea interface .
I have made a ninja edit and crashed my site, how can I roll back?
You need to identify the commit that crashed the site and revert it. You can see the commits that have been made in our Gitea interface , by going to your site’s repository -> Commits. Clicking the SHA of a commit will display the changes that have been made in the commit in question.
If it’s a simple change that crashed your site, you can edit the file in question to undo the changes that made it crash and make a new commit. Check our Gitea tutorial for more information.
If you need to revert the commit, you have to clone your repository locally and run a git revert command. The steps are as follows:
- Clone your repository locally:
git clone git@git.presslabs.net:username/mysite.git
cd mysite
- Check the commits that have been made:
git log
- Select the SHA of the commit causing problems and revert it:
git revert <SHA of the commit you want to revert>
- Push the changes:
git push
The Fork git client offers a simple way to revert the commit, check our Fork tutorials on mac or windows for more information.
How can I prevent ninja edits in the future?
You have the possibility to disable code edits from our dashboard, from the Settings section.